
MySQLのインストールする方法ってどうやるのかな?
設定方法も分からないや。
そうだ!ふくろう先生に聞いてみよう。
ふくろう先生。こんにちは。
MySQLをインストールする方法ってどうやればいいですか?
設定方法も分からないので教えて下さい。
ナマケモノ君。こんにちは!
今回は、MySQLをインストール方法と環境設定だね。
わかったよ。
次の手順に従っていけば、出来るよ。
今回の最終目標
- MySQLのインストールを完了させて標準的な設定を行います。
用意するもの
- CentOS7がインストールされているPC(Server)を1台。
概要
- MySQLをインストールします。
- インストールしたMySQL の初期設定を行います。
- ファイアウォールを設定を行います。
作業手順
CentOSのインストールが、まだの方はこちらを参照して下さい。![]()
step.1
いたずらをするといけないので念のため、
mariaDBのパッケージをアンインストールして下さい。
yum remove mariadb-libs

step.2
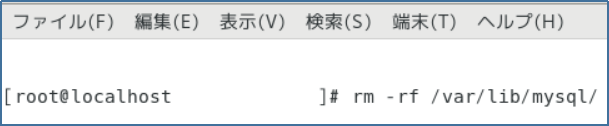
mariaDBのフォルダーも念のため削除して下さい。
rm -rf /var/lib/mysql/
step.3
yumのレボジトリに追加します。
rpm –import https://repo.mysql.com/RPM-GPG-KEY-mysql-2022
yum localinstall http://dev.mysql.com/get/mysql57-community-release-el7-.noarch.rpm


step.4
パッケージの詳細情報を確認して下さい。
yum info mysql-community-server

step.5
MySQLをインストールして下さい。
yum install mysql-community-server

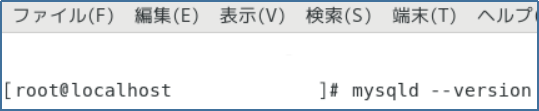
step.6
MySQLのバージョンを確認して下さい。
mysqld –version
step.7
MySQLの自動実行の設定をして下さい。
systemctl enable mysqld.service

step.8
MySQLの開始して下さい。
systemctl start mysqld.service

step.9
初期パスワードの確認をして下さい。
メモしておく(緑枠の部分に表示される)
cat /var/log/mysqld.log | grep password

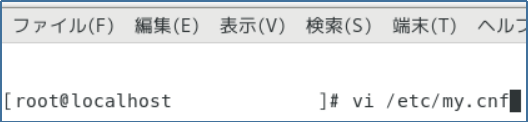
step.10
『my.cnf』を表示して下さい。
vi /etc/my.cnf
step.11
『my.cnf』の末尾にカーソルを移動して下さい。
『i』を押下して、挿入モードにして下さい。
パスワードポリシーの無効化するために『validate-password=OFF』入力して下さい。

step.12
保存するために、『esc』キーを押下してコマンドモードに戻してから
『:wq!』を入力して『enter』キー押下して下さい。

step.13
MySQLを再起動して下さい。
systemctl restart mysqld.service

step.14
MySQLのパスワード等の設定を行って下さい。
下記の順番で対応して下さい。
- 『mysql_secure_installation』を入力して『enter』キーを押下して下さい。
- 『Enter password for user root:』と聞いてくるので、
step9でメモしておいたパスワードを入力して『enter』キーを押下して下さい。 - 『New password:』と聞いてくるので、
新しいパスワードを入力して『enter』キーを押下して下さい。
※新しいパスワードは任意の値ですので必ずメモしておいて下さい。 - 『Re-enter new password:』と聞いてくるので、
先程の任意のパスワードを再度入力して『enter』キーを押下して下さい。 - 『Change the password for root? :』と聞いてきますが、
今回は、rootのパスワードを変更する必要がないので『n』を入力して『enter』キーを押下して下さい。 - 『Remove anonymous users? :』と聞いてくるので、
今回は、匿名ユーザーアカウントは削除するので『y』を入力して『enter』キーを押下して下さい。 - 『Disallow root login remotely? :』と聞いてくるので、
今回は、testデータベースは削除するので『y』を入力して『enter』キーを押下して下さい。 - 『Reload privilege tables now? :』と聞いてくるので、
今回は、privilegeテーブルを再読み込みするので『y』を入力して『enter』キーを押下して下さい。
| 実際のコマンドは次のようになります。 対話式ですので、Yes(Y) か No(n) で答えれば良いです。 # mysql_secure_installation Securing the MySQL server deployment. Enter password for user root: 初期パスワードを入力する The existing password for the user account root has expired. Please set a new password. New password: 新しいパスワードを入力する Re-enter new password: 再度同じ新しいパスワードを入力する VALIDATE PASSWORD PLUGIN can be used to test passwords and improve security. It checks the strength of password and allows the users to set only those passwords which are secure enough. Would you like to setup VALIDATE PASSWORD plugin? Press y|Y for Yes, any other key for No: y There are three levels of password validation policy: LOW Length >= 8 MEDIUM Length >= 8, numeric, mixed case, and special characters STRONG Length >= 8, numeric, mixed case, special characters and dictionary file Please enter 0 = LOW, 1 = MEDIUM and 2 = STRONG: 0 Using existing password for root. Estimated strength of the password: 100 Change the password for root ? ((Press y|Y for Yes, any other key for No) : y New password: ポリシーに沿った新しいパスワードを入力 Re-enter new password: 再度新しいパスワードを入力する Estimated strength of the password: 50 Do you wish to continue with the password provided?(Press y|Y for Yes, any other key for No) : y By default, a MySQL installation has an anonymous user, allowing anyone to log into MySQL without having to have a user account created for them. This is intended only for testing, and to make the installation go a bit smoother. You should remove them before moving into a production environment. Remove anonymous users? (Press y|Y for Yes, any other key for No) : y Success. Normally, root should only be allowed to connect from ‘localhost’. This ensures that someone cannot guess at the root password from the network. Disallow root login remotely? (Press y|Y for Yes, any other key for No) : y Success. By default, MySQL comes with a database named ‘test’ that anyone can access. This is also intended only for testing, and should be removed before moving into a production environment. Remove test database and access to it? (Press y|Y for Yes, any other key for No) : y Success. – Removing privileges on test database… Success. Reloading the privilege tables will ensure that all changes made so far will take effect immediately. Reload privilege tables now? (Press y|Y for Yes, any other key for No) : y Success. All done! |
step.15
ファイアウォールの新規ゾーンの作成をして下さい。
firewall-cmd –permanent –new-zone=from_webserver

step.16
ファイアウォールのリロードをして下さい。
systemctl reload firewalld

step.17
ファイアウォールの設定をして下さい。
firewall-cmd –permanent –zone=from_webserver –add-source=”192..168.0.0/24″
firewall-cmd –permanent –zone=from_webserver –add-port=3306/tcp
firewall-cmd –zone=from_webserver –add-service=mysql


step.18
ファイアウォールをリロードして下さい。
systemctl reload firewalld

Complete!!
お疲れ様でした。
これで晴れてMySQLのインストール及び環境設定は完了です。
ナマケモノ君。出来たかな?
はい!。出来ました。
ふくろう先生、ありがとうございました。


コメント