
Mattermost(8.1.2)のインストールする方法ってどうやるのかな?
設定方法も分からないや。
そうだ!ふくろう先生に聞いてみよう。

ふくろう先生。こんにちは。
Mattermost(8.1.2)をインストールする方法ってどうやればいいですか?
設定方法も分からないので教えて下さい。

ナマケモノ君。こんにちは!
今回は、Mattermost(8.1.2)をインストール方法と環境設定だね。
わかったよ。
次の手順に従っていけば、出来るよ。
今回の最終目標
- Mattermost(8.1.2)のインストールを完了させて標準的な設定を行います。
用意するもの
- Ubuntu(22.04) がインストールされているPC(Server)を1台。
概要
- Mattermost(8.1.2)をインストールします。
- インストールしたMattermost(8.1.2)の初期設定を行います。
作業手順
Ubuntuのインストールが、まだの方はこちらを参照して下さい。

step.1
アップデートするよ。


step.2
パスワードを入力してね。


step.3
次はアップグレードするよ。


step.4
今回はアップグレードの確認画面だね。
『y』で答えてね。


step.5
MariaDBを削除しておくよ。


step.6
AutoRemoveの実行もしておくよ。


step.7
次はアップデートをするよ。


step.8
MySQL-Serverのインストールをするよ。


step.9
念のためMySQLのバージョン確認するね。
バージョン情報が表示されれば、正しくインストールされているからね。


step.10
それでは、MySQLを開始するよ。


step.11
MySQLが自動開始するように設定するよ。


step.12
MySQLへログインするよ。


step.13
パスワードを聞いて来るけど今回は何も入力しないでエンターキーを押下してね。


step.14
パスワードの設定をしてね。


step.15
MySQLの初期化を開始するよ。
下記の順番で対応してね。

- 『mysql_secure_installation』を入力して『enter』キーを押下だよ。
- 『Enter password for user root:』と聞いてくるので、
step18でメモしておいたパスワードを入力して『enter』キーを押下してね。
- 『New password:』と聞いてくるので、
新しいパスワードを入力して『enter』キーを押下してね。
※新しいパスワードは任意の値ですので必ずメモしておいて下さい。 - 『Re-enter new password:』と聞いてくるので、
先程の任意のパスワードを再度入力して『enter』キーを押下してね。 - 『Change the password for root? :』と聞いてきますが、
今回は、rootのパスワードを変更する必要がないので『n』を入力して『enter』キーだよ。 - 『Remove anonymous users? :』と聞いてくるので、
今回は、匿名ユーザーアカウントは削除するので『y』を入力して『enter』キーを押下してね。 - 『Disallow root login remotely? :』と聞いてくるので、
今回は、testデータベースは削除するので『y』を入力して『enter』キーを押下してね。 - 『Reload privilege tables now? :』と聞いてくるので、
今回は、privilegeテーブルを再読み込みするので『y』を入力して『enter』キーを押下してね。
| 実際のコマンドは次のようになります。 対話式ですので、Yes(Y) か No(n) で答えれば良いです。 # mysql_secure_installation Securing the MySQL server deployment. Enter password for user root: 初期パスワードを入力する The existing password for the user account root has expired. Please set a new password. New password: 新しいパスワードを入力する Re-enter new password: 再度同じ新しいパスワードを入力する VALIDATE PASSWORD PLUGIN can be used to test passwords and improve security. It checks the strength of password and allows the users to set only those passwords which are secure enough. Would you like to setup VALIDATE PASSWORD plugin? Press y|Y for Yes, any other key for No: y There are three levels of password validation policy: LOW Length >= 8 MEDIUM Length >= 8, numeric, mixed case, and special characters STRONG Length >= 8, numeric, mixed case, special characters and dictionary file Please enter 0 = LOW, 1 = MEDIUM and 2 = STRONG: 0 Using existing password for root. Estimated strength of the password: 100 Change the password for root ? ((Press y|Y for Yes, any other key for No) : y New password: ポリシーに沿った新しいパスワードを入力 Re-enter new password: 再度新しいパスワードを入力する Estimated strength of the password: 50 Do you wish to continue with the password provided?(Press y|Y for Yes, any other key for No) : y By default, a MySQL installation has an anonymous user, allowing anyone to log into MySQL without having to have a user account created for them. This is intended only for testing, and to make the installation go a bit smoother. You should remove them before moving into a production environment. Remove anonymous users? (Press y|Y for Yes, any other key for No) : y Success. Normally, root should only be allowed to connect from ‘localhost’. This ensures that someone cannot guess at the root password from the network. Disallow root login remotely? (Press y|Y for Yes, any other key for No) : y Success. By default, MySQL comes with a database named ‘test’ that anyone can access. This is also intended only for testing, and should be removed before moving into a production environment. Remove test database and access to it? (Press y|Y for Yes, any other key for No) : y Success. – Removing privileges on test database… Success. Reloading the privilege tables will ensure that all changes made so far will take effect immediately. Reload privilege tables now? (Press y|Y for Yes, any other key for No) : y Success. All done! |

step.16
一度MySQLからログアウトしてね。


step.17
変更したパスワードでログインするからね。


step.18
データベースを作成するよ。


step.19
mysqlにmmuserを作成するよ。


step.20
mmuserに権限を割り振るよ。


step.21
設定が完了したのでmysqlから抜けるよ。


step.22
さぁ ここからがMattermost関係だよ。
Mattermostを獲得するので、wgetでダウンロードしてね。


step.23
ダウンロードした圧縮ファイルを解凍してね。


step.24
解凍したフォルダーをOPTの配下へ移動するよ。


step.25
dataフォルダーを作成してね。


step.26
UbuntuにMattermostというユーザーを追加するよ。


step.27
Mattermost配下のフォルダーやファイルの所有者を変更してね。


step.28
Mattermost配下のフォルダーやファイルの権限も変更してね。


step.29
Mattermostのconfigファイルの内容を変更するよ。


step.30
画面のようにmmuserで検索するからね。


step.31
おっと長い文章が書かれているね。
赤線のところをMySQL用に変更するからね。
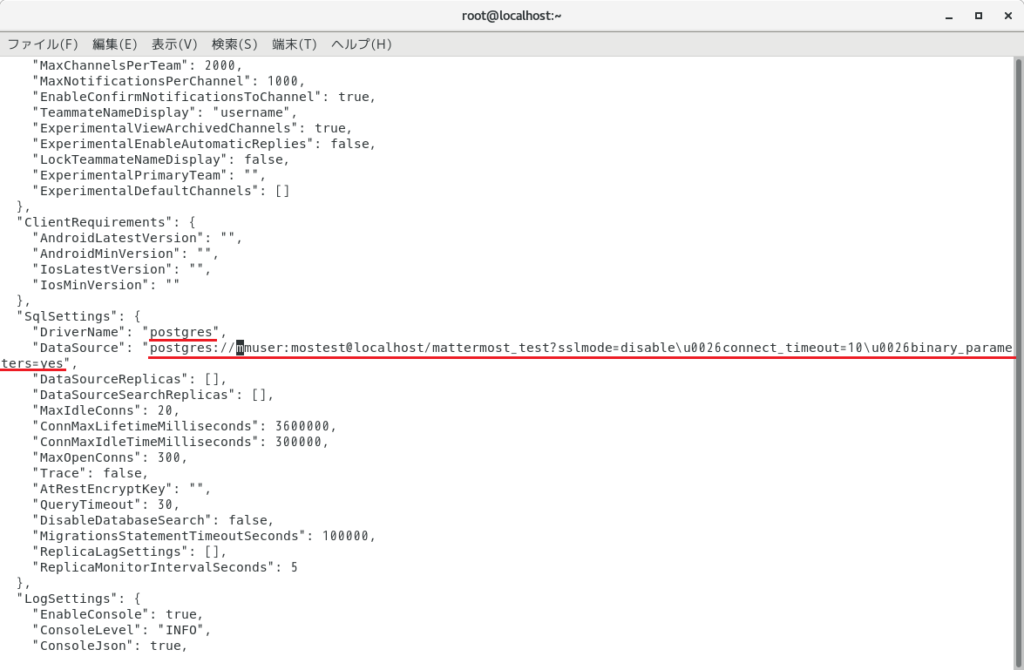
下記の内容に変更だよ。
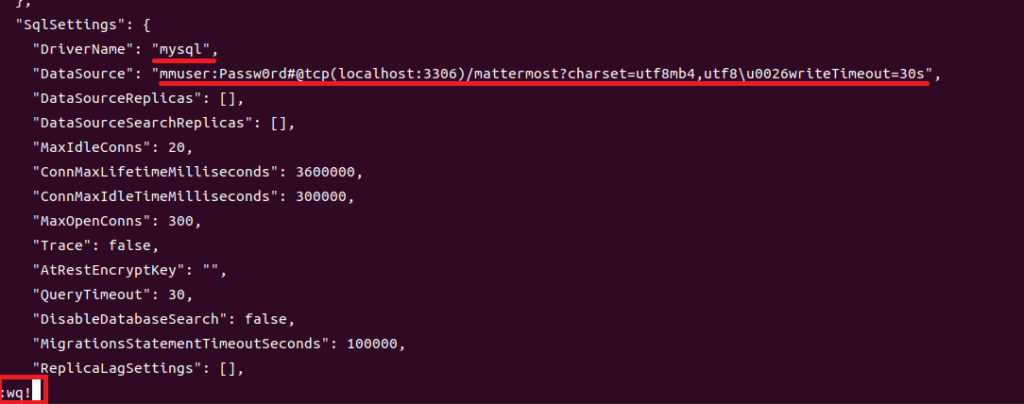
“DriverName”:”mysql”,
“DataSource”:”mmuser:Passw0rd#@tcp(localhost:3306)/mattermost?charset=utf8mb4,utf8\u0026writeTimeout=30s”,

step.32
さっ 変更できたので保存して終了だよ。
『wq!』だね。

step.33
さぁいよいよMattermostの開始だよ。
起動せよ!!Mattermost。


step.34
色々と起動時のログが流れていくのでログ出力が落ち着いたら
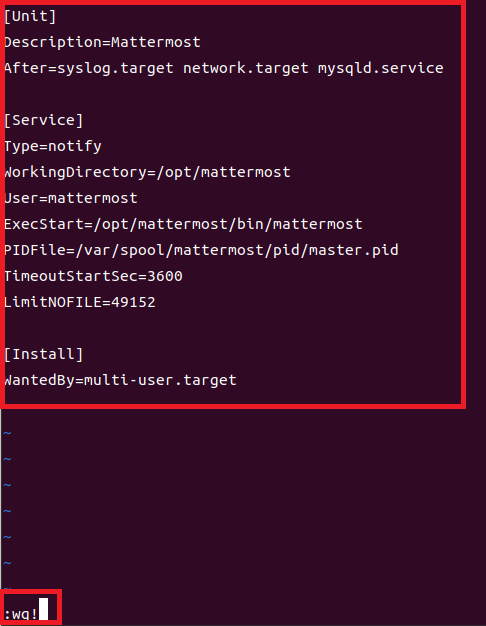
Mattermostのサービスファイルに追記するよ。


step.35
下記内容を追記するよ。

step.36
Mattermost.serviceファイルの権限を変更してね。


step.37
変更が色々あったのでリロードだね。


step.38
Mattermostが自動起動するように呪文を・・・。


step.39
Mattermostを起動させるよ。


step.40
あっ ファイヤーウォールの変更もしなくちゃね。
まず、httpポートを空けるよ。


step.41
次にファイヤーウォールを空けるのはhttpsポートだよ。


step.42
最後に8065ポートも空けてね。
これでファイヤーウォールの設定は完了です。


step.43
ファイヤーウォールをリロードして下さい。


step.44
使い慣れたブラウザーのURLに『localhost:8065』と入力してね。
あっ このURLの場合は、MattermostをインストールしたPC(Server)だからね。
他の端末の場合は、MattermostをインストールしたPC(Server)に割り当てられているIPでアクセスしてね。


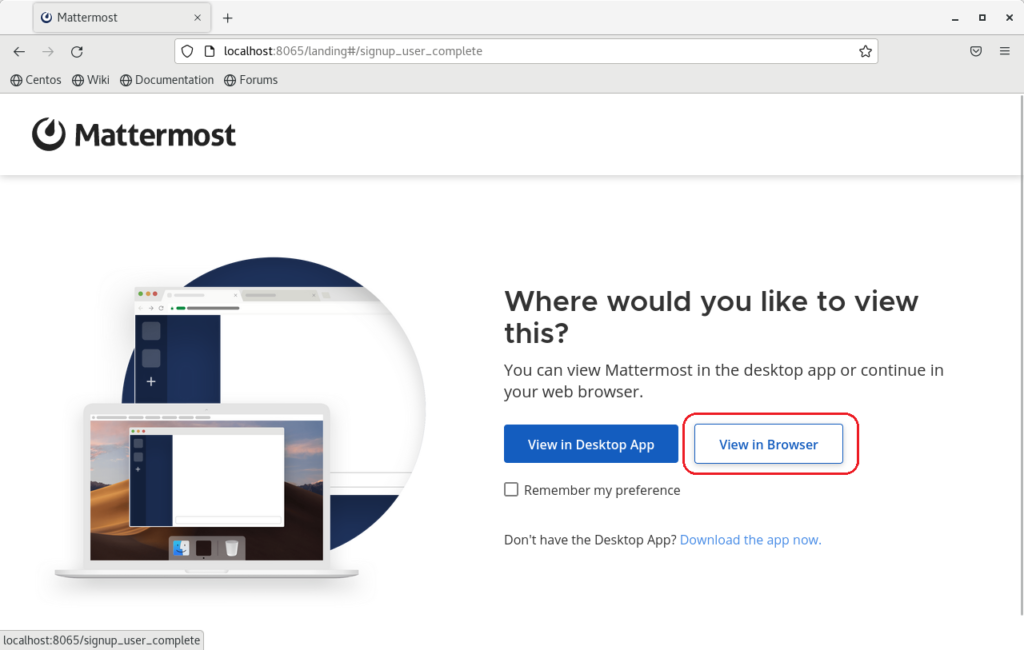
step.45
おっ 上手く画面が表示されました。
『View in Browser』を押下してね。

step.46
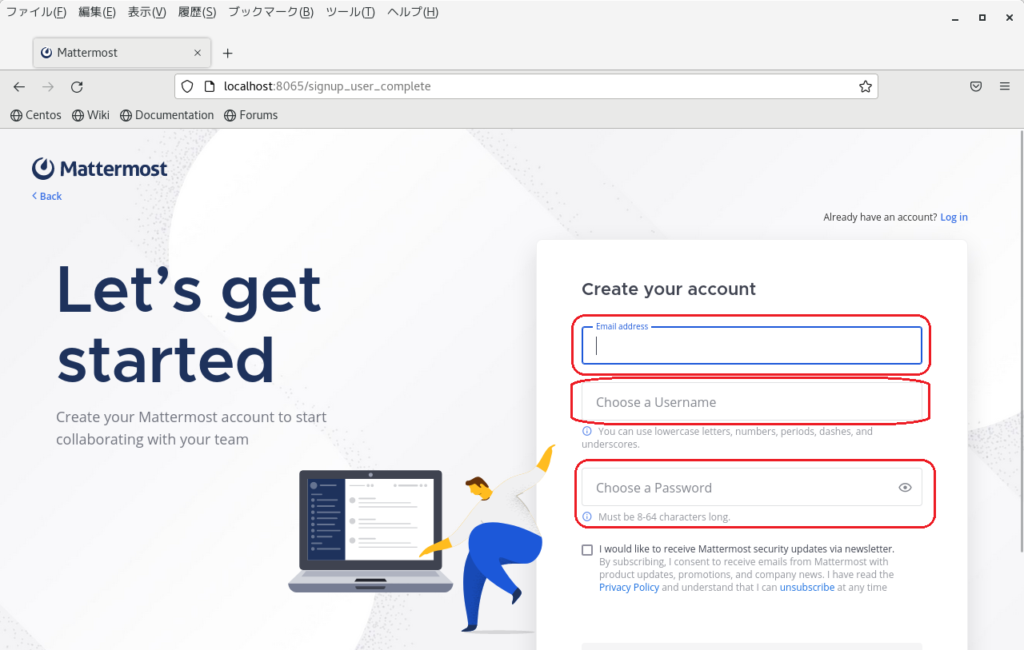
アカウントを作成するのでメールアドレス、氏名、パスワードを入力してね。

step.47
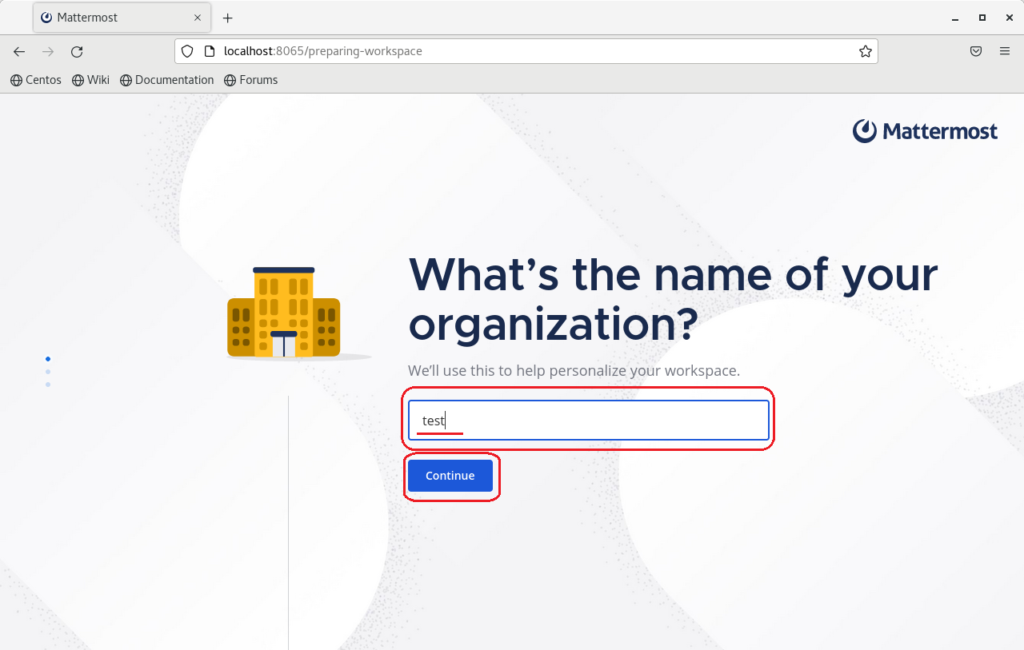
ワークスペースの作成するので、今回はとりあえずなので『test』を入力したよ。
その後に『Continue』ボタンを押下。

step.48
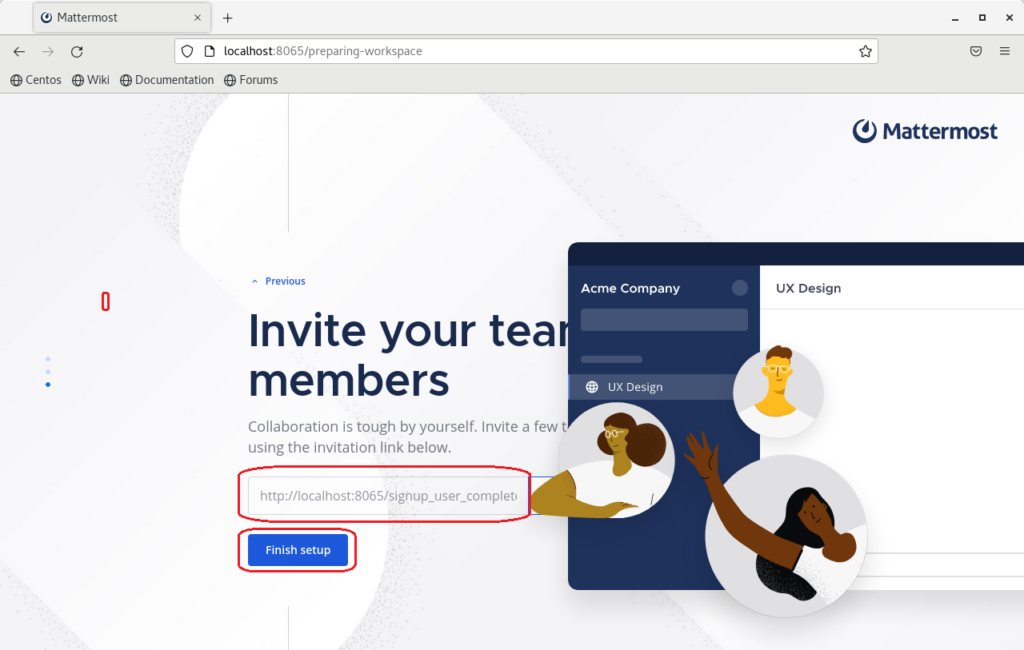
アクセスするためのURLが表示されるよ。その後『Finish setup』ボタンを押下。

step.49
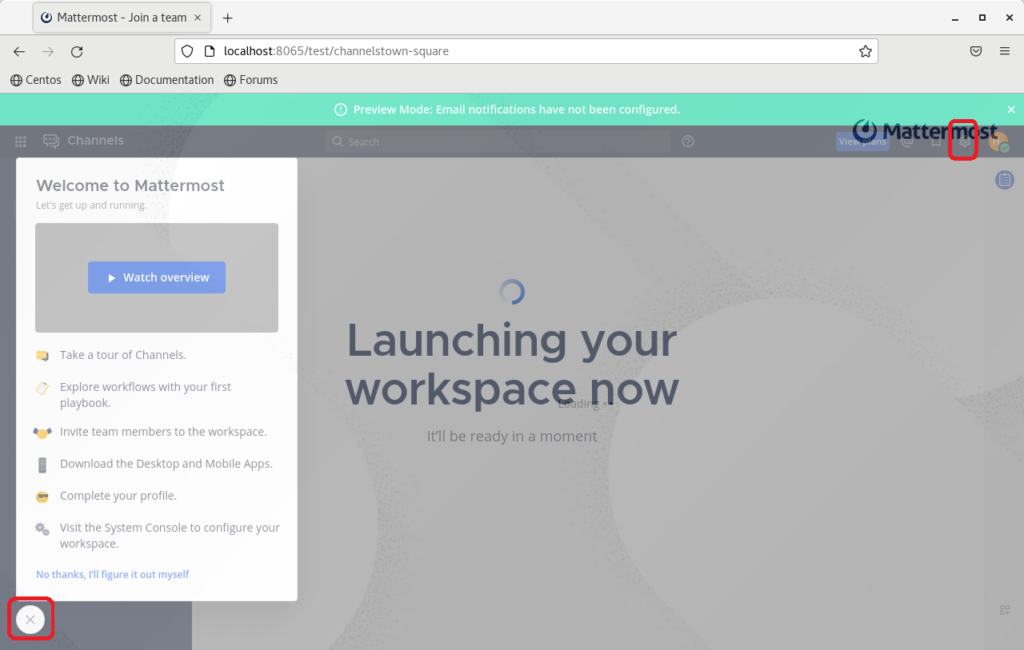
右上赤く囲ったマーク『⊛』を押下して。英語表示を日本語表示に変更するよ。

step.50
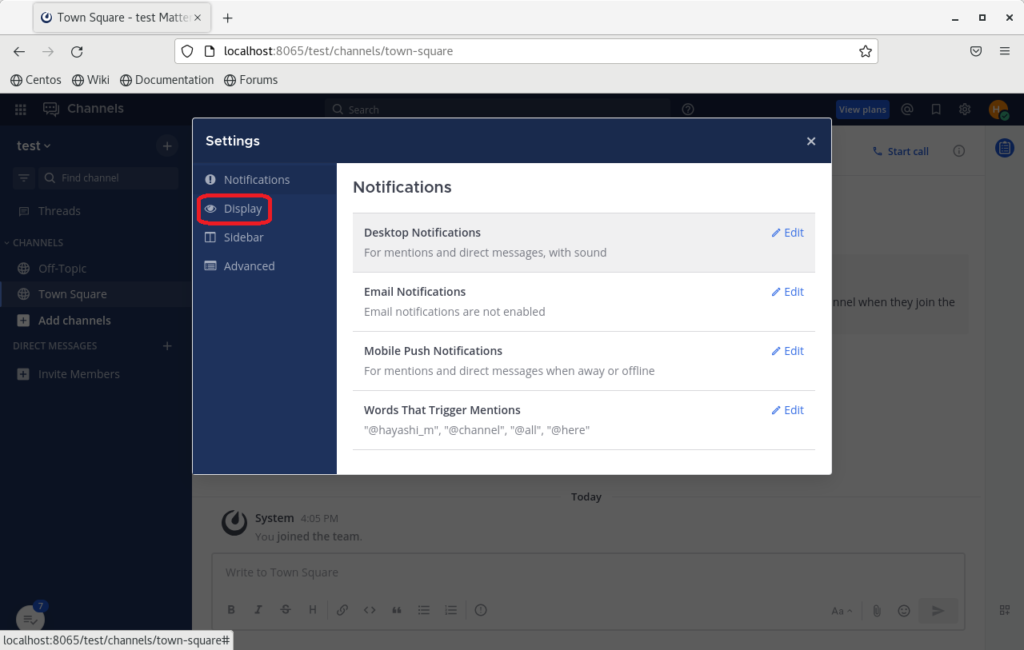
『Display』ボタンを押下してね。

step.51
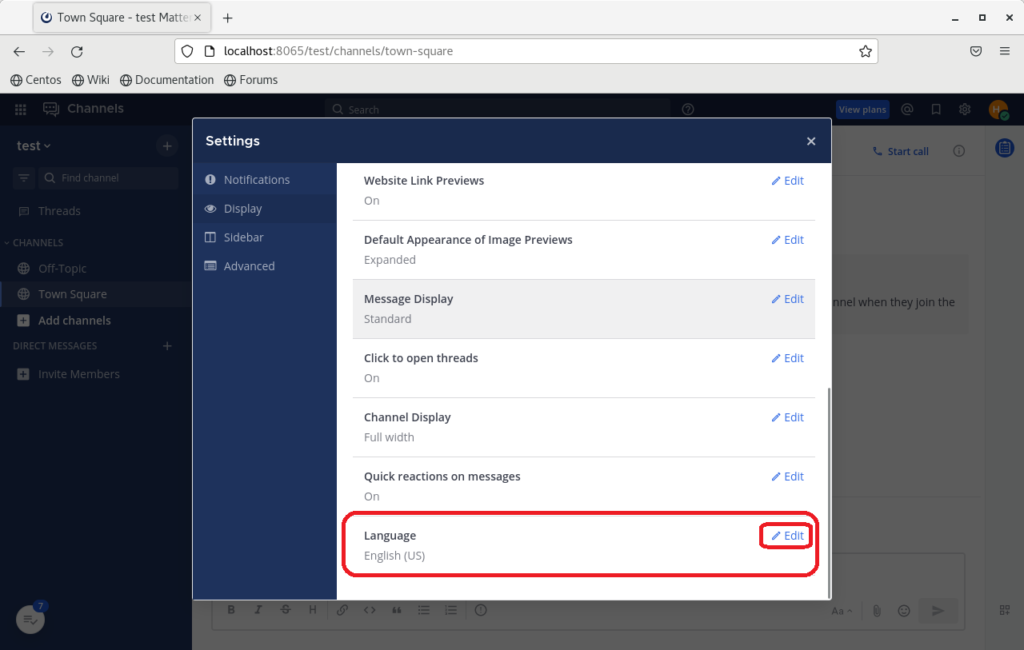
『Languege』欄の『Edit』を押下するよ。

step.52
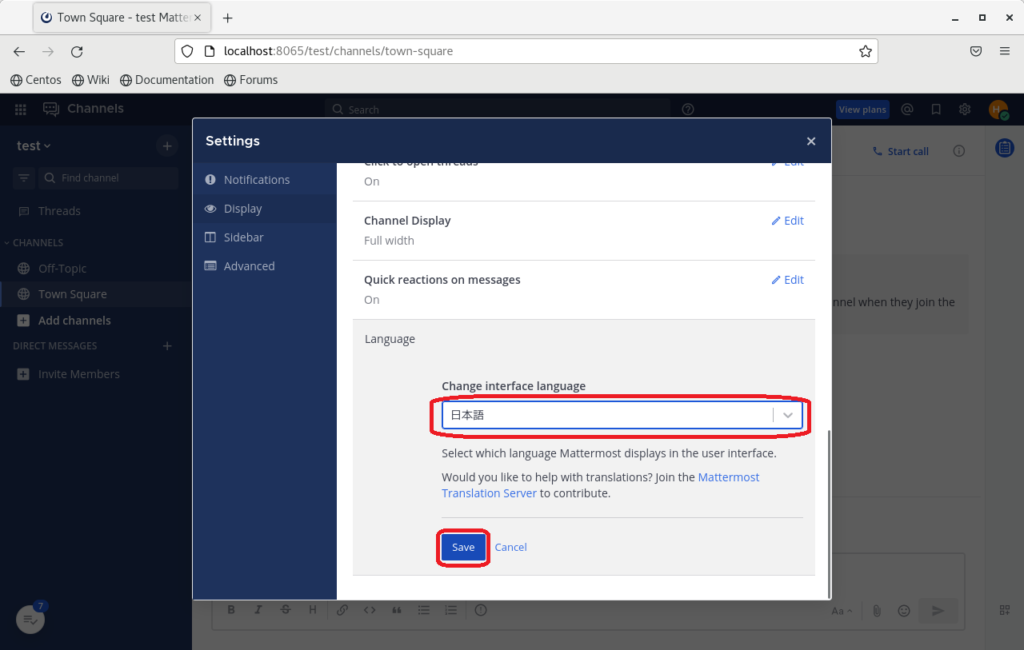
プルダウンメニューの中から『日本語』を選択して『Save』ボタンを押下だね。

step.53
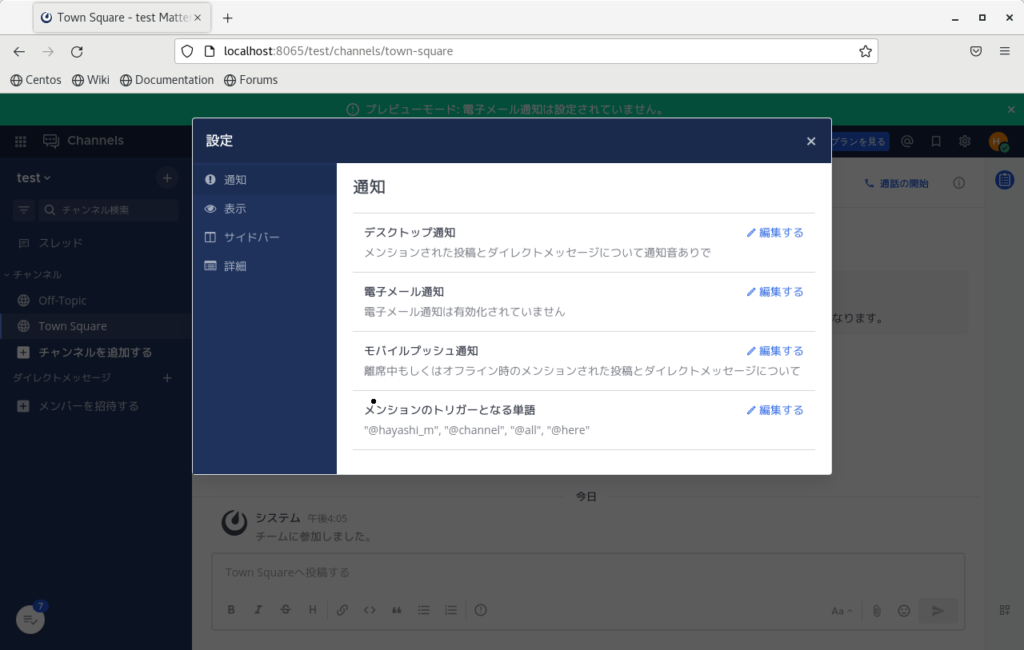
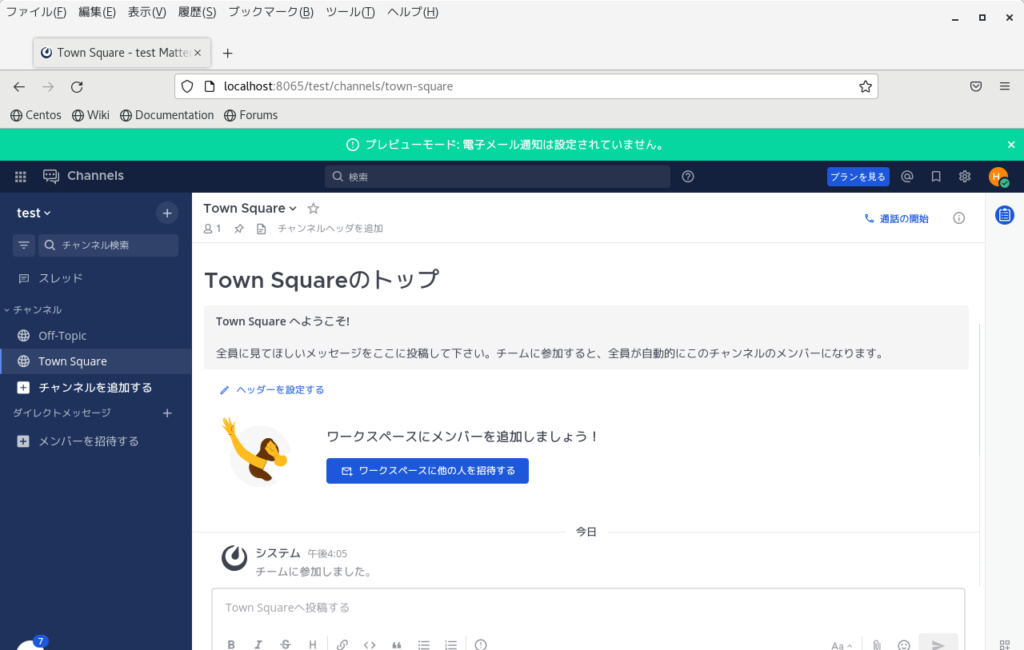
日本語に表示が変わったら成功!

step.54
トップ画面に戻ってきたので、これで終了です。
さぁ Mattermostを使って社内コミュニケーションを活性化・見える化・共有化しよう!!
Complete!!

お疲れ様でした。
これで晴れてMattermost(8.1.2)のインストール及び環境設定は完了です。
ナマケモノ君。出来たかな?

はい!。出来ました。
ふくろう先生、ありがとうございました。
コーポレートサイトhttps://www.rin-tech.netを開設しました。
どうぞ、よろしくお願いいたします。



コメント