
作成工程
step.1
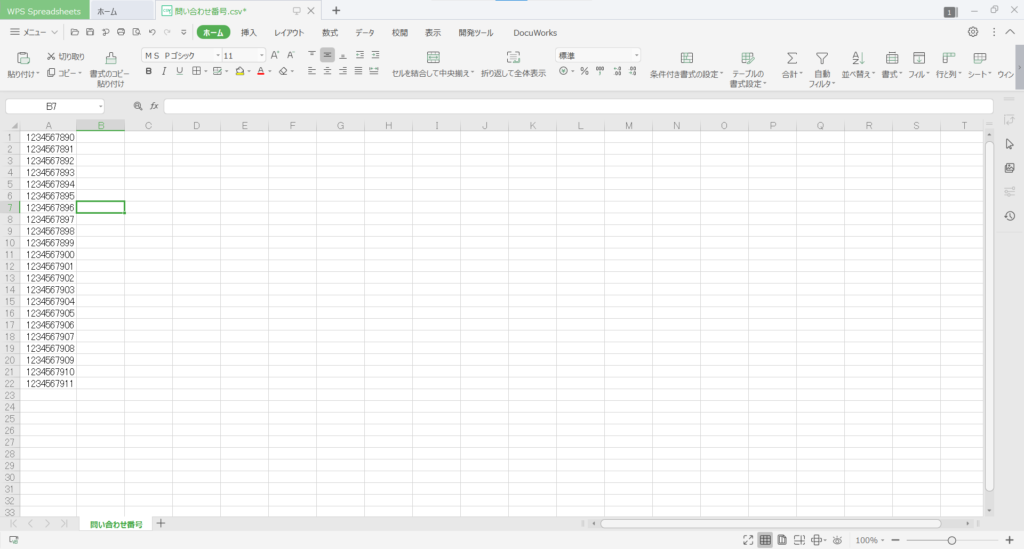
西濃運輸さんのフローとサンプル用の問い合わせ番号.csvを用意します。
また、問い合わせ番号.csvはA列に10桁の問い合わせ番号をセットしています。
step.2
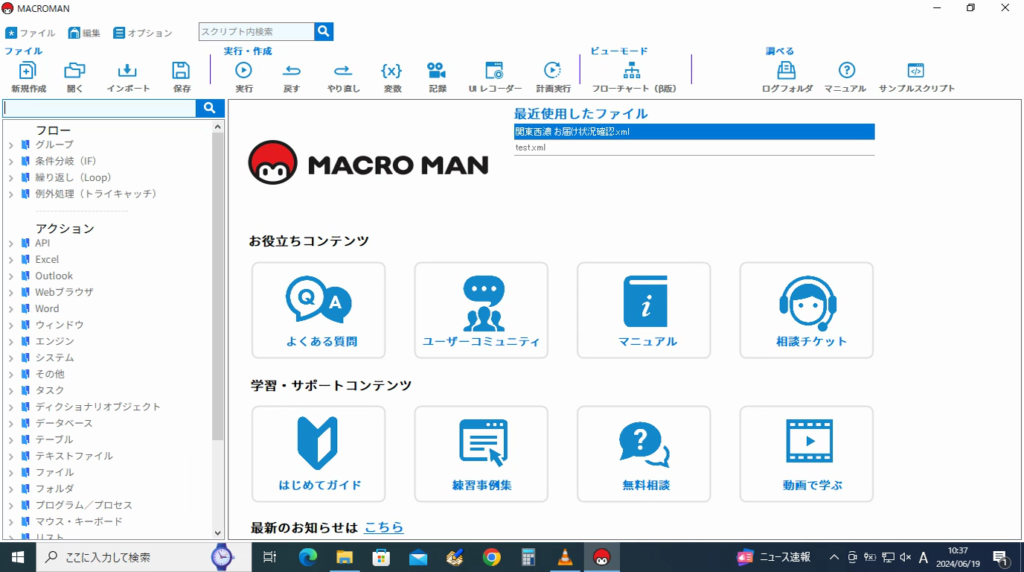
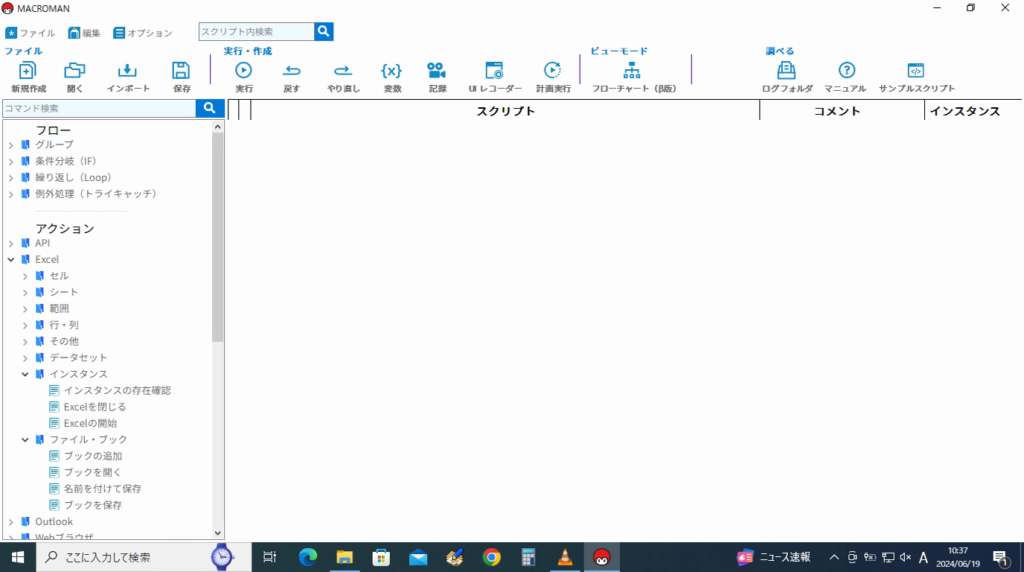
まず、MACROMANを起動して下さい。
step.3
MACROMANが起動したら、画面上の新規作成を押下して下さい。

step.4
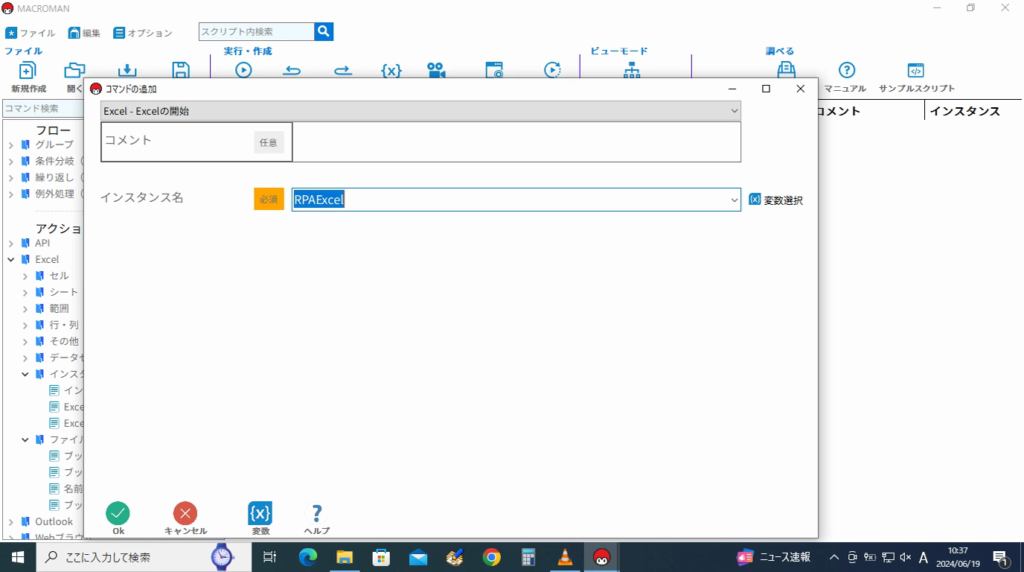
左側の「アクション」の中から「Excel」をクリック。
展開された中から「インスタンス」をクリック。
インスタンスの中から「Excelの開始」をクリック。
「Excelの開始」画面が表示されますので、そのまま「OK」ボタンをクリック。
step.5
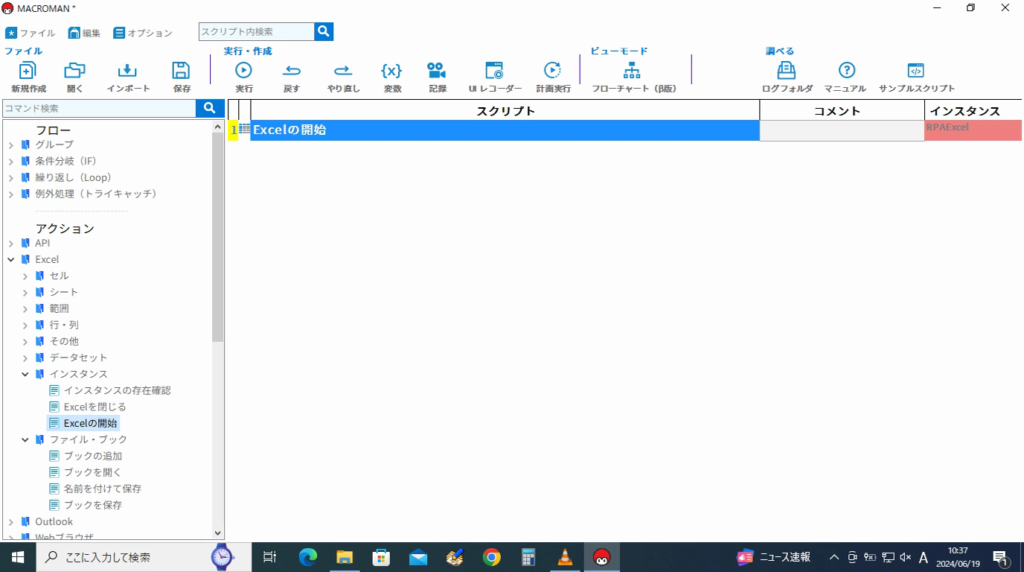
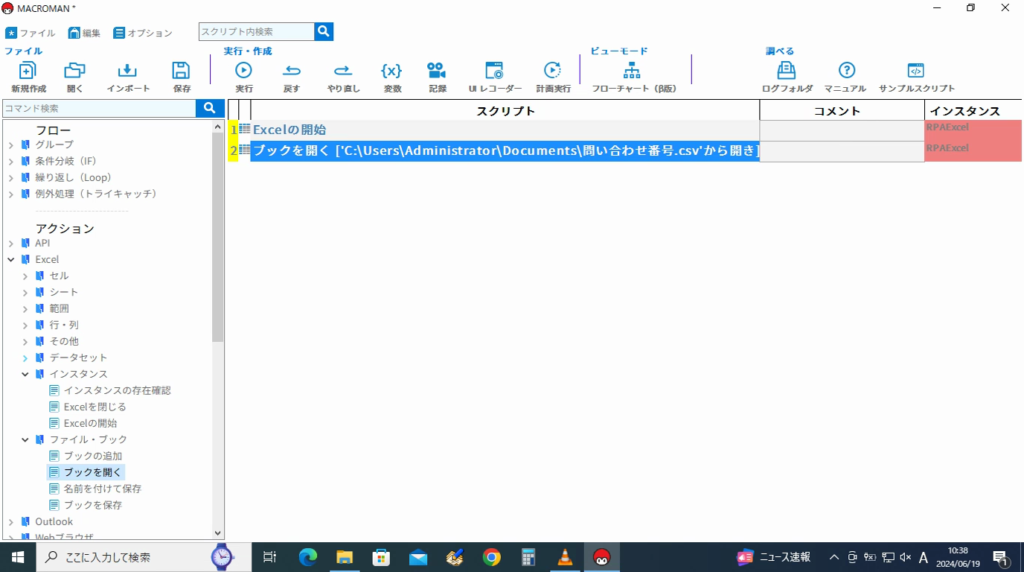
一覧に「Excelの開始」が追加されます。
step.6
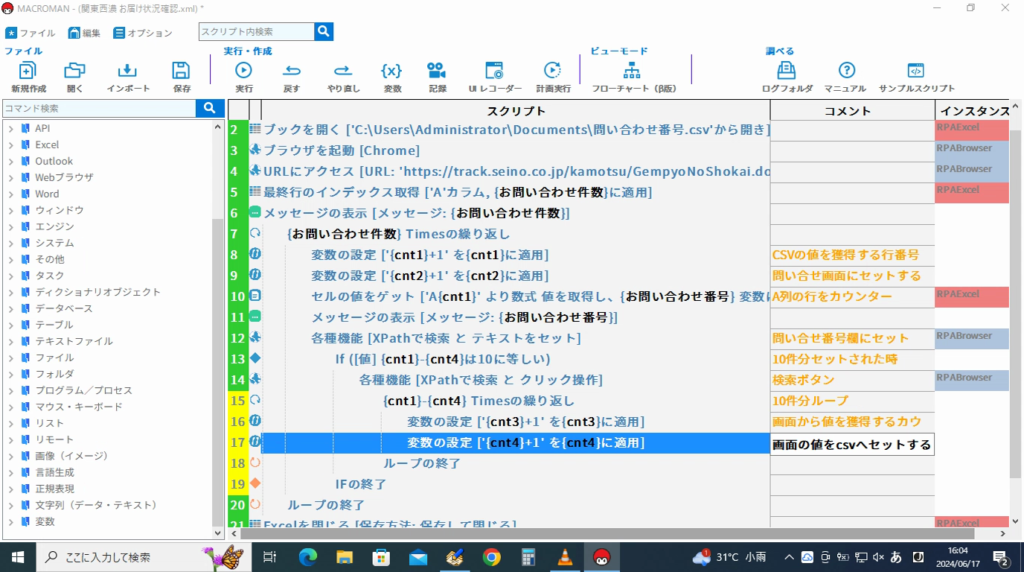
次に「アクション」の中から「Excel」をクリック。
展開された中から「ファイル・ブック」をクリック。
ファイル・ブックの中から「ブックを開く」をクリック。
step.7
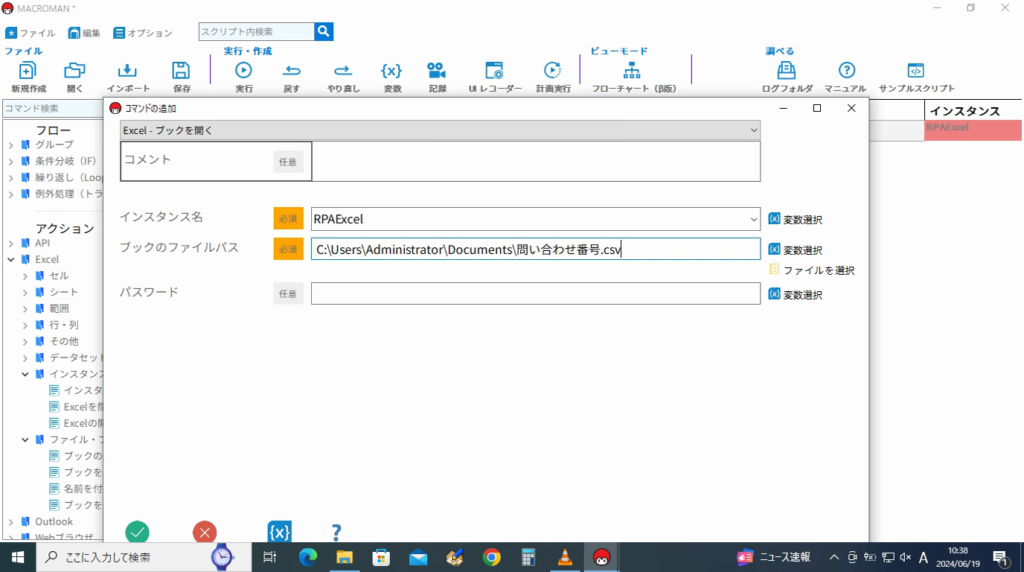
「ブックを開く」画面が表示されます。
| インスタンス名 | 「RPAExcel」を選択。 |
| ブックのファイルパス | 右側の「ファイルを選択」を押下して「問い合わせ番号.csv」のフルパスをセットして下さい。 |
| パスワード | 今回はブランクのまま。 |
最後に「OK」ボタンをクリック。
step.8
一覧に「ブックを開く」が追加されます。
step.9
次に「アクション」の中から「Webブラウザ」をクリック。
展開された中から「インスタンス」をクリック。
インスタンスの中から「ブラウザを起動」をクリック。

step.10
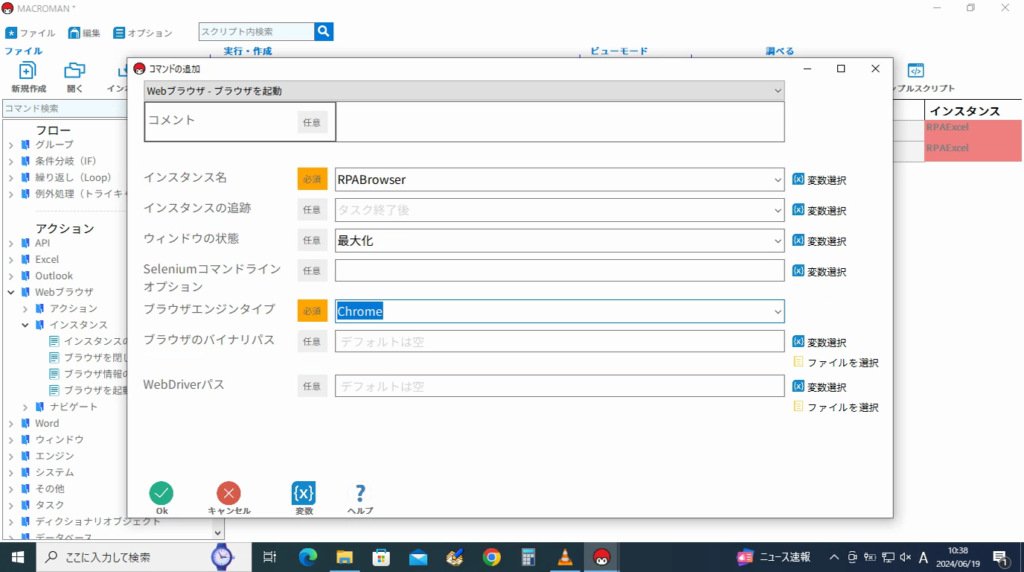
「ブラウザを起動」画面が表示されます。
| インスタンス名 | 「RPABrowser」を選択。 |
| ウィンドウの状態 | 「最大化」を選択。 |
| ブラウザエンジンのタイプ | 「Chrome」を選択。 |
最後に「OK」ボタンをクリック。
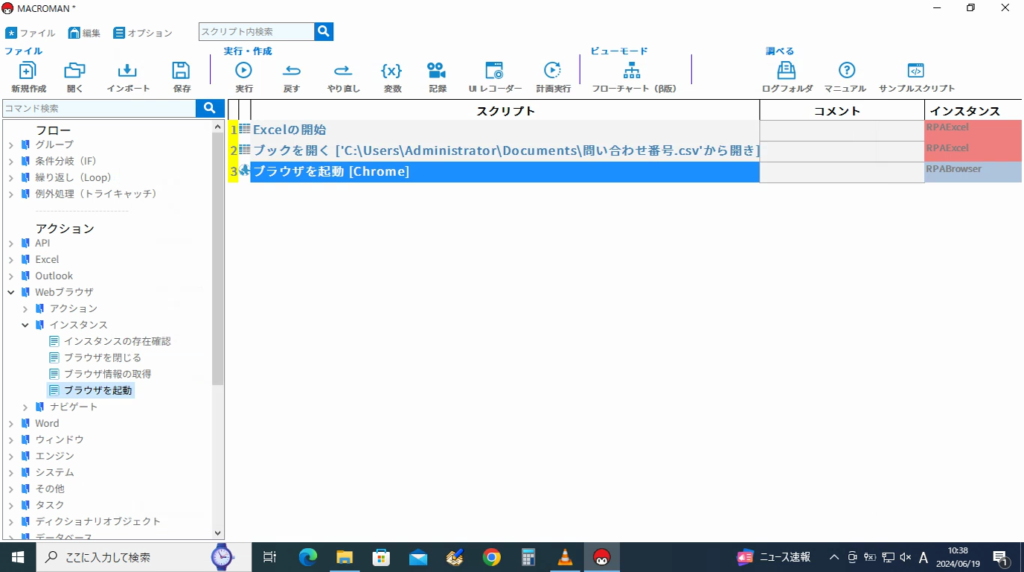
step.11
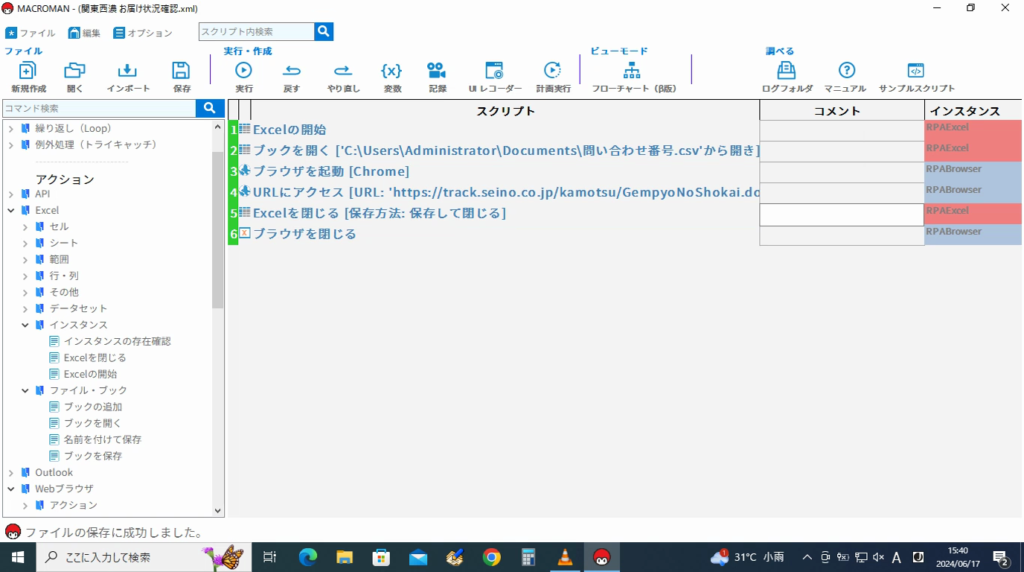
一覧に「ブラウザを起動[Chrome]」が追加されます。
step.12
ここまでの動作を確認するために、スクリプトを保存します。
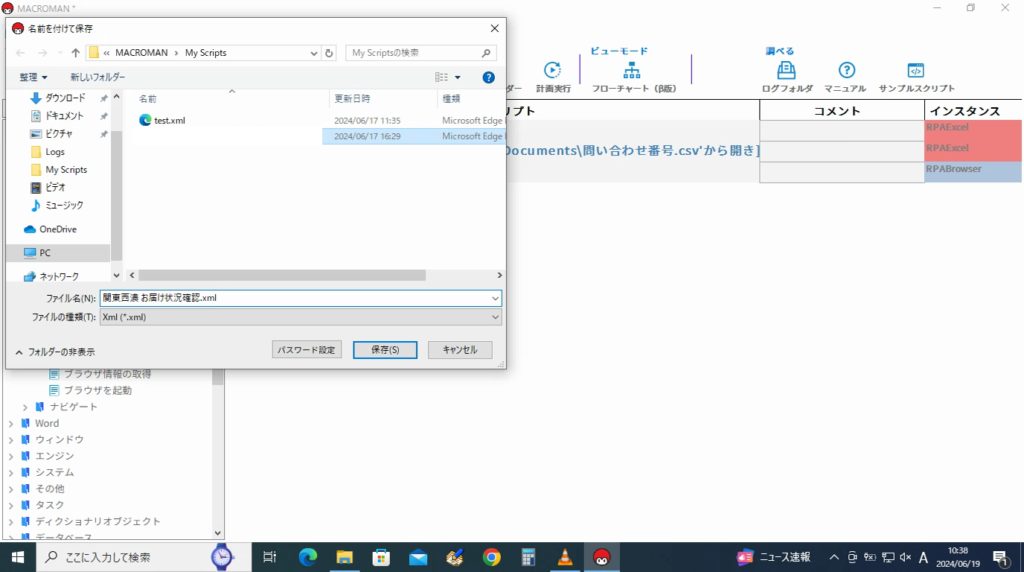
画面上の「保存」ボタンをクリック。
「名前を付けて保存」画面が表示されますので
ファイル名に任意の名前を付けて「保存」ボタンを押下して下さい。
今回は「関東西濃お届け状況確認」としました。
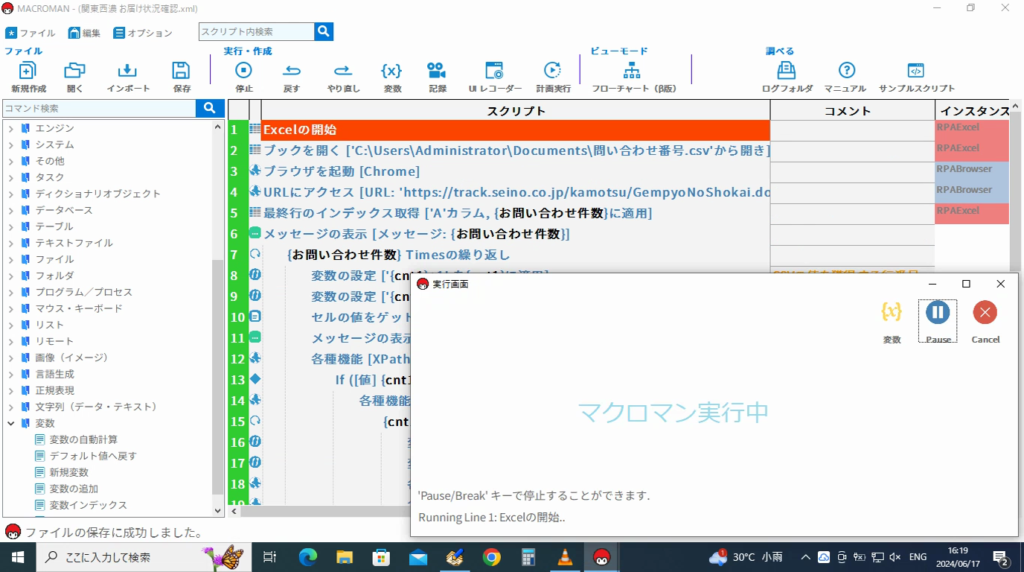
step.13
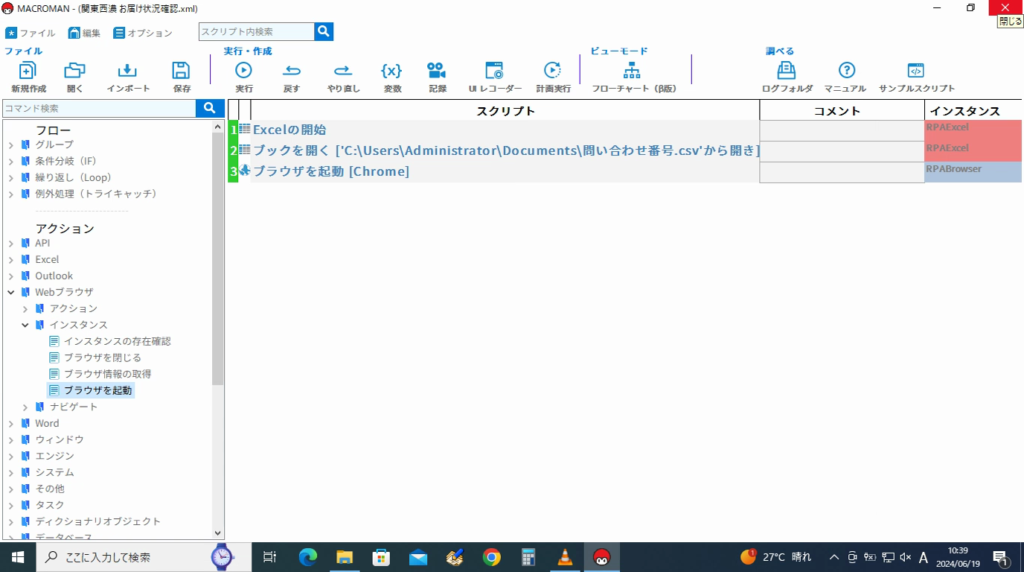
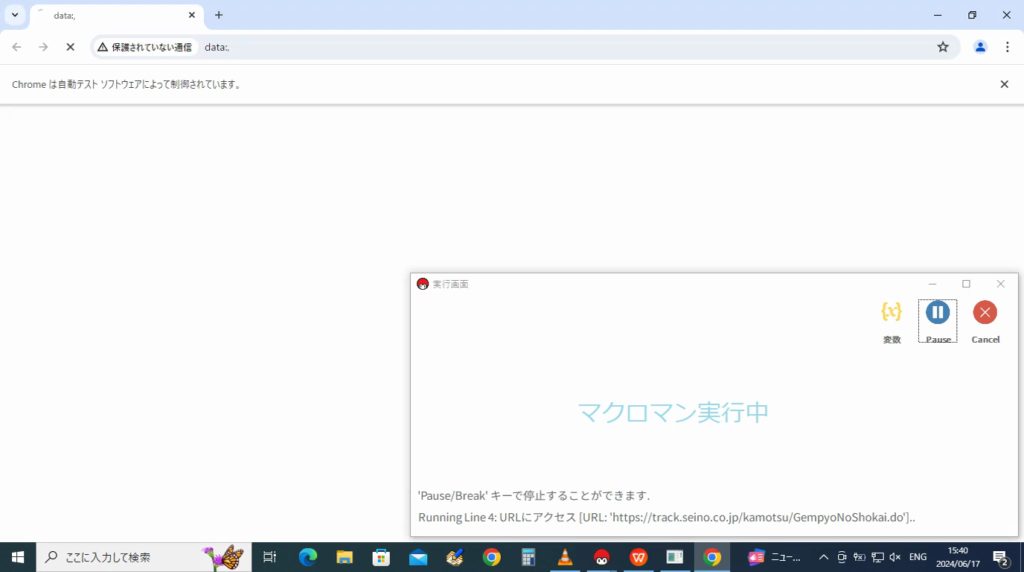
画面上の「実行」ボタンをクリック。
スクリプトを順番に実行して行くのが分かると思います。
次に「アクション」の中から「ナビゲート」をクリック。
展開された中から「URLにアクセス」をクリック。
step.14
「URLにアクセス」画面が表示されます。
| インスタンス名 | 「RPABrowser」を選択。 |
| URL | 「https://track.seino.co.jp/cgi-bin/gnpquery.pgm」を入力。 |
最後に「OK」ボタンをクリック。

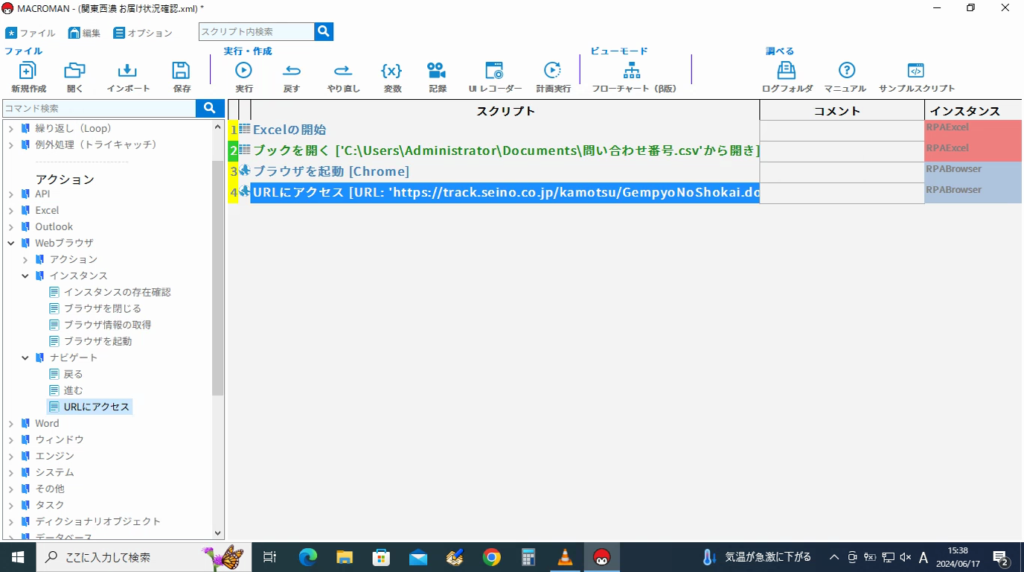
step.15
一覧に「URLにアクセス」が追加されます。
次に「アクション」の中から「Webブラウザ」をクリック。
展開された中から「インスタンス」をクリック。
インスタンスの中から「ブラウザを閉じる」をクリック。
step.16
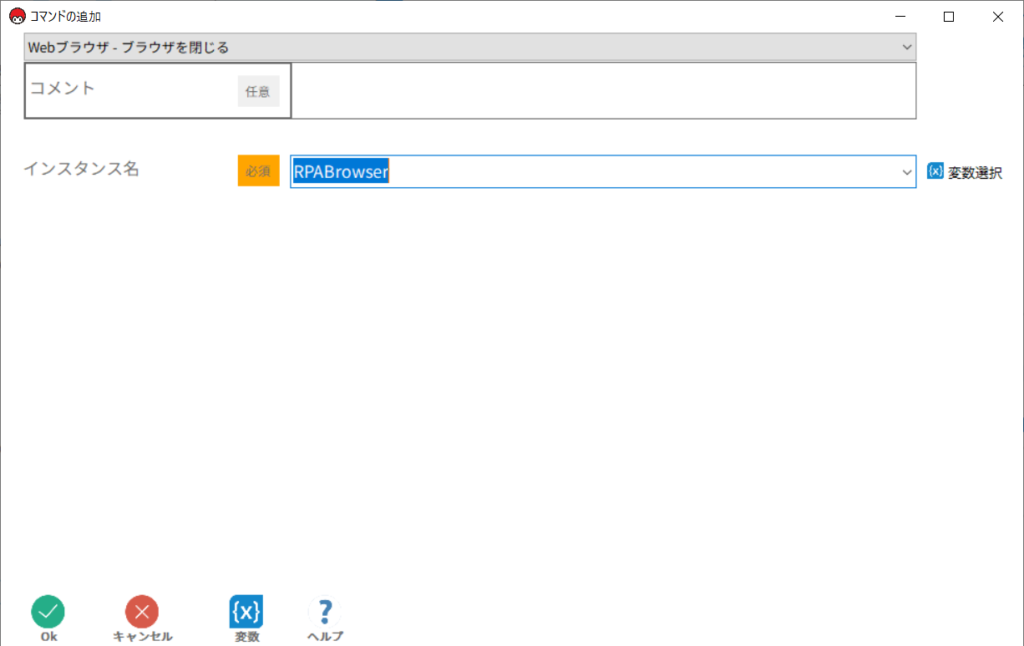
「ブラウザを閉じる」画面が表示されます。
| インスタンス名 | 「RPABrowser」を選択。 |
最後に「OK」ボタンをクリック。
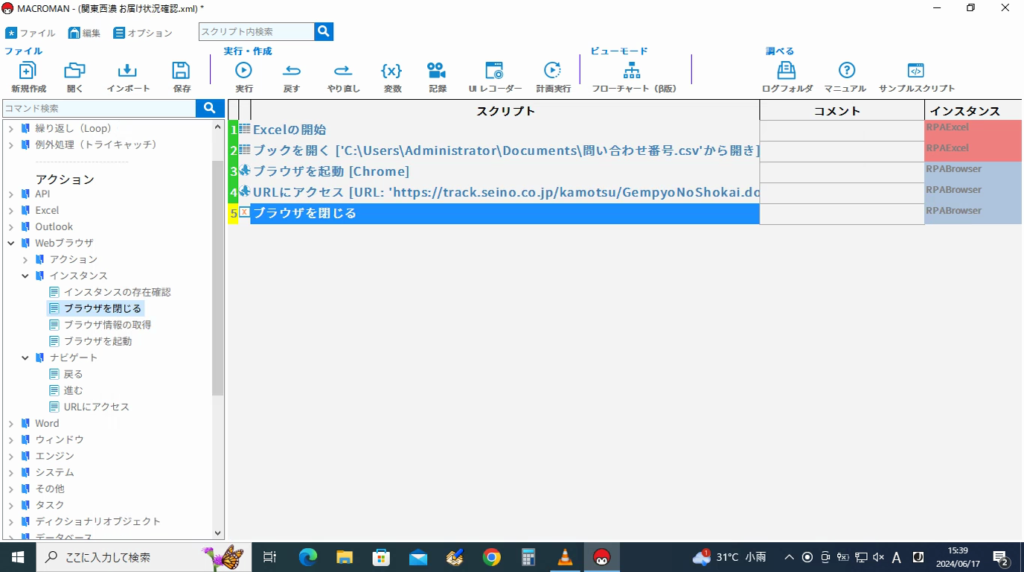
step.17
一覧に「ブラウザを閉じる」が追加されます。
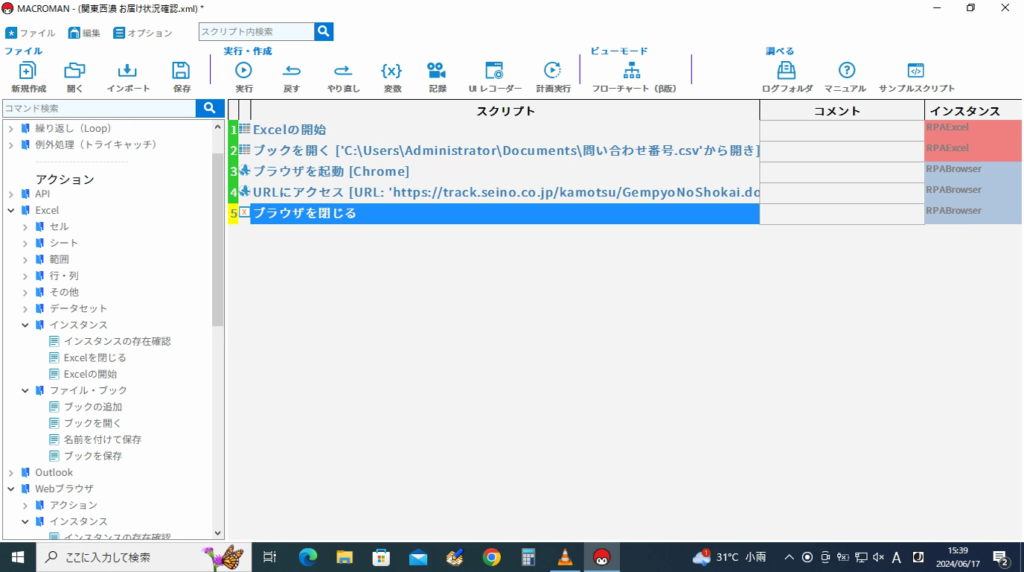
step.18
次に「アクション」の中から「Excel」をクリック。
展開された中から「ファイル・ブック」をクリック。
ファイル・ブックの中から「名前を付けて保存」をクリック
step.19
「名前を付けて保存」画面が表示されます。
| インスタンス名 | 「RPAExcel」を選択。 |
最後に「OK」ボタンをクリック。

step.20
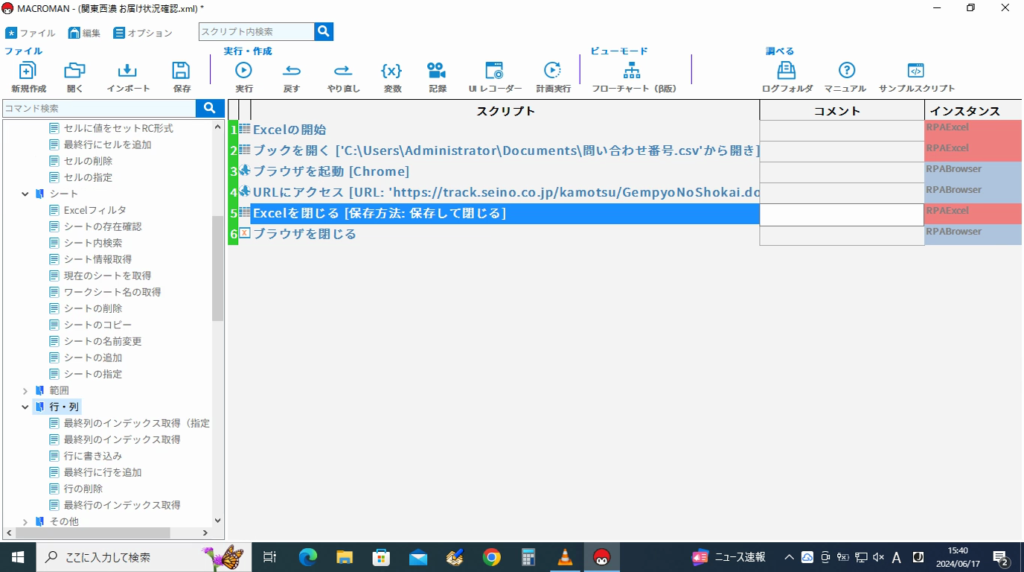
一覧に「Excelを閉じる」が追加されます。
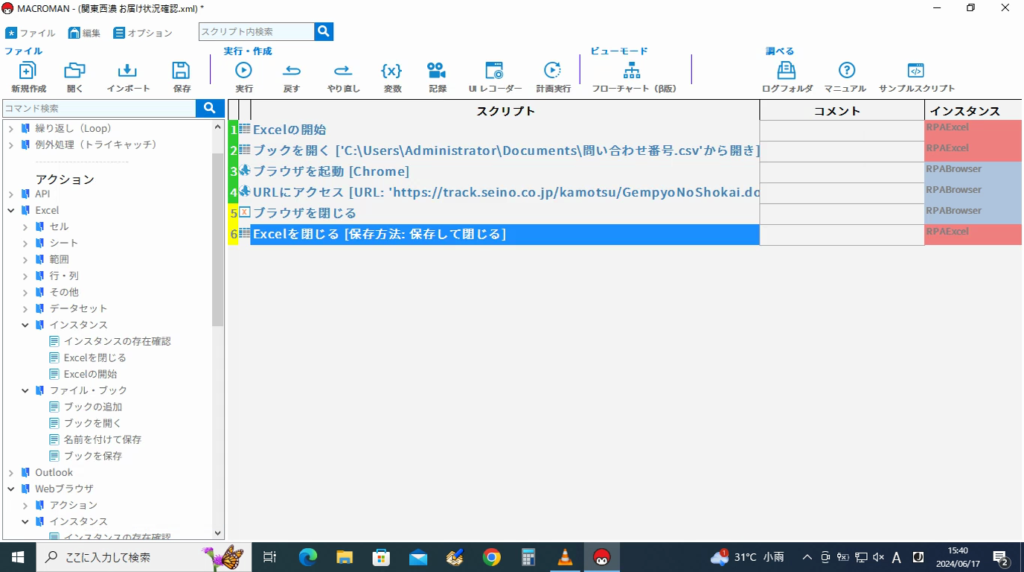
step.21
一覧の「ブラウザを閉じる」と「Excelを閉じる」の順番を入れ替えます。
画面上の「実行」ボタンをクリック。
step.22
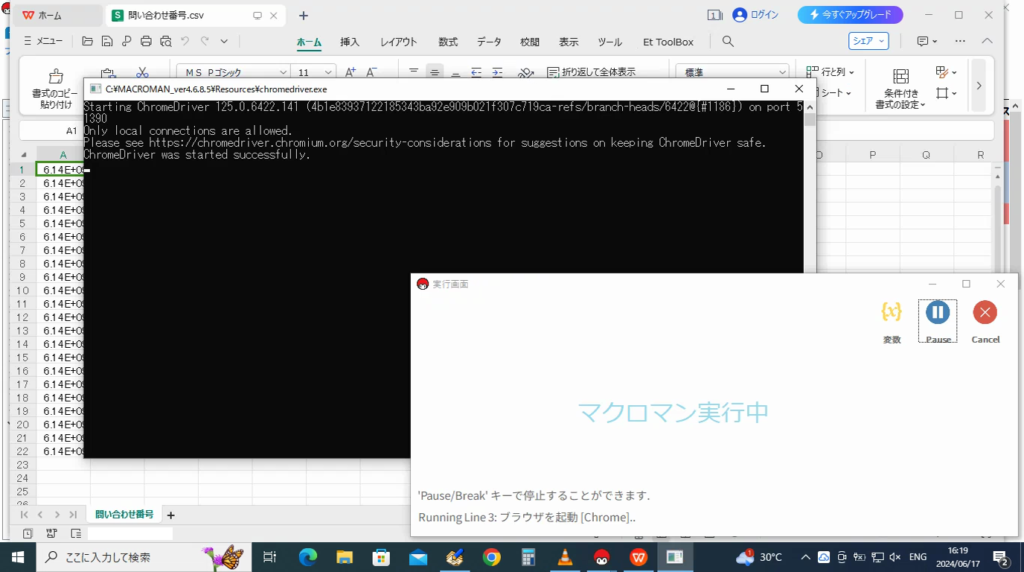
スクリプトを順番に実行して行くのが分かると思います。
まず、ブラウザが起動します。
step.23
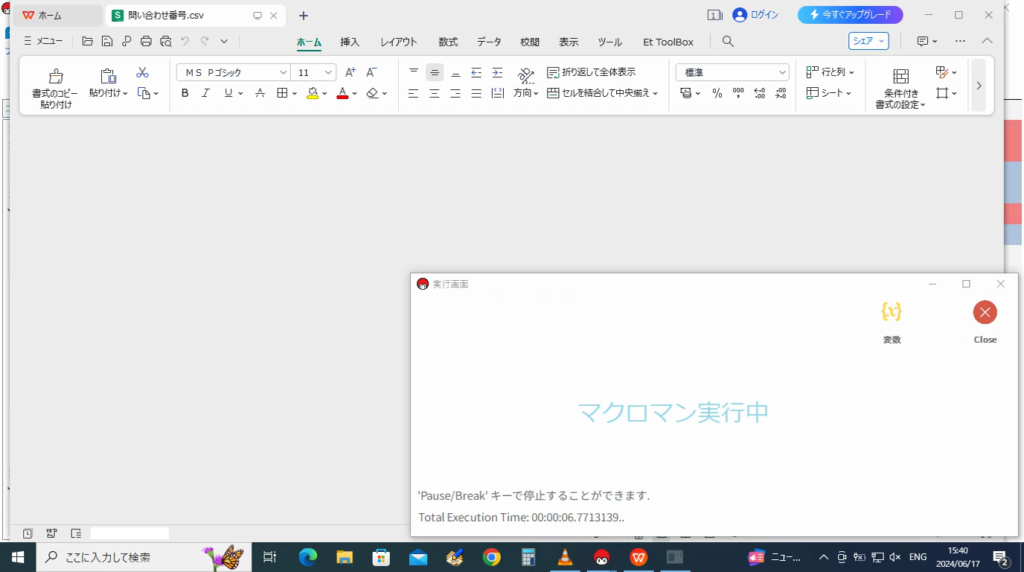
次にcsvファイルを開きます。
一連の動作を行って終了します。
step.24
次にcsvの最終行数を獲得したいので「アクション」の中から「Excel」をクリック。
展開された中から「行・列」をクリック。
行・列の中から「最終行のインデックス取得」をクリック。
step.25
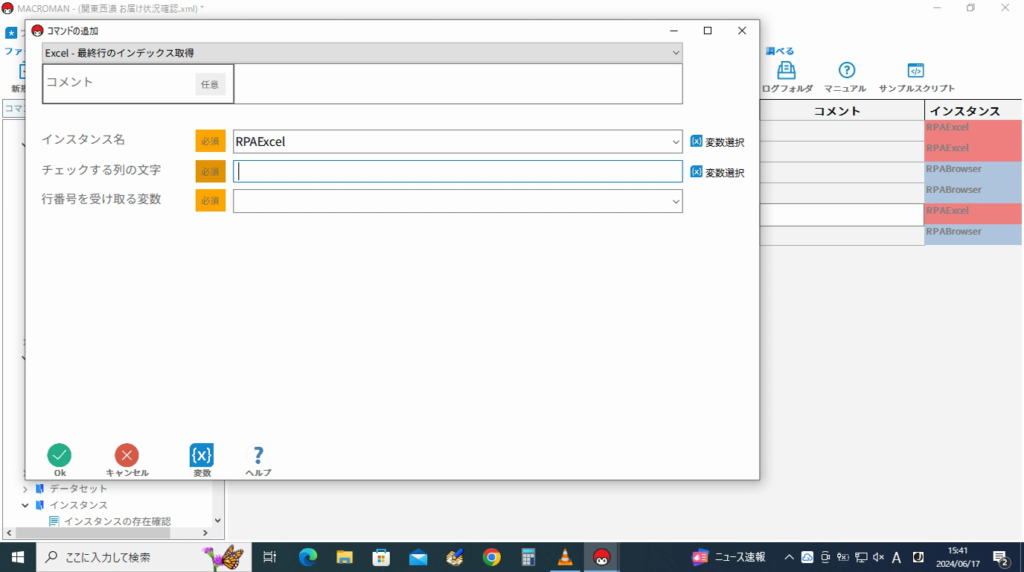
「最終行のインデックス取得」画面が表示されます。
| インスタンス名 | 「RPAExcel」を選択。 |
| チェックする列の文字 | 何を設定するのか分からないので下段の「?」ボタンをクリック。 |
step.26
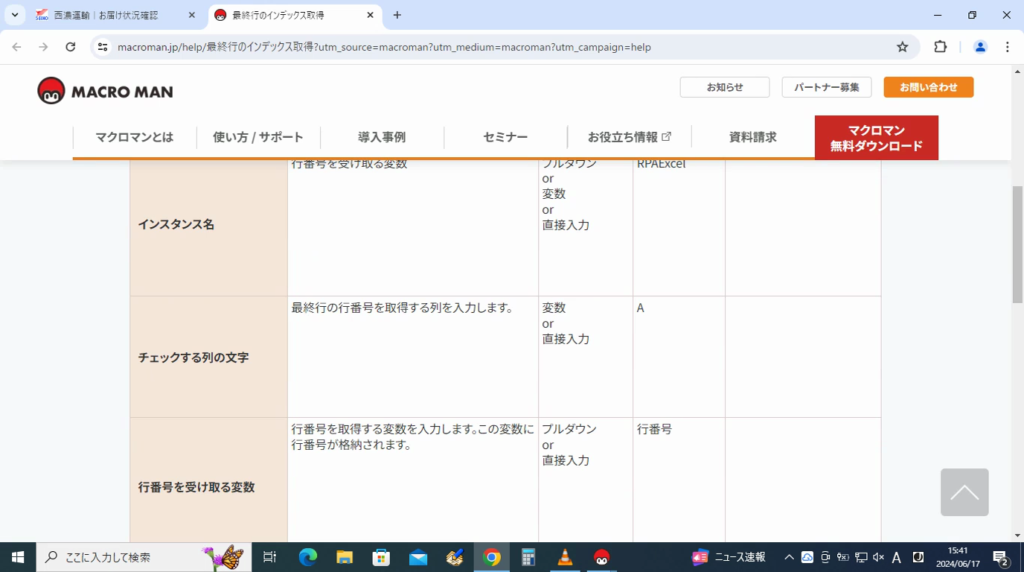
ヘルプ画面が表示されます。
「チェックする列の文字」の内容を確認にして意味を理解して下さい。
右上の閉じるボタンをクリック。
step.27
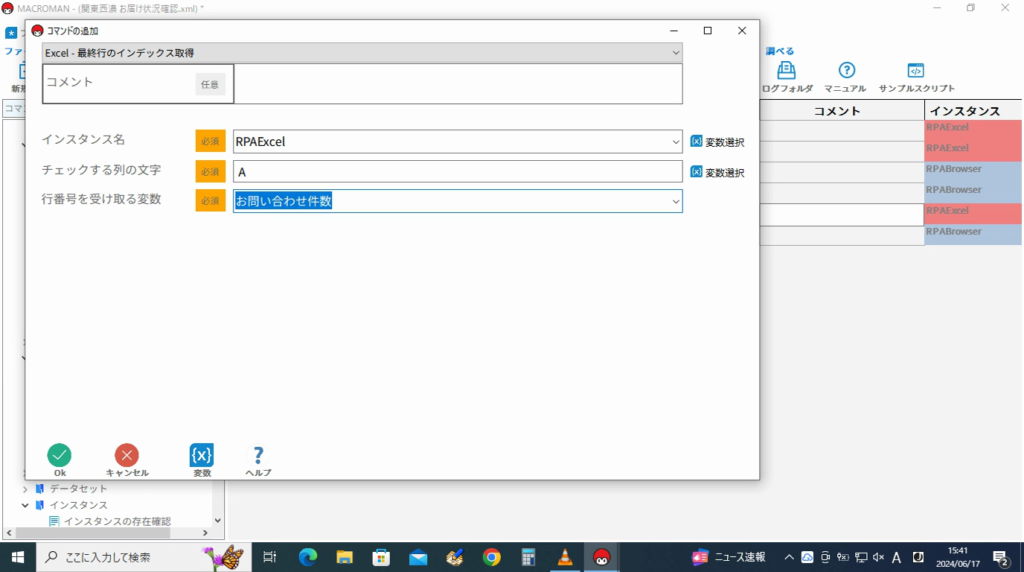
再度、「最終行のインデックス取得」画面が表示されます。
| インスタンス名 | 「RPAExcel」を選択。 |
| チェックする列の文字 | 「A」を入力。 |
| 行番号を受け取る変数 | 右側の▽を押下して「お問い合わせ件数」を選択。 |
最後に「OK」ボタンをクリック。
step.28
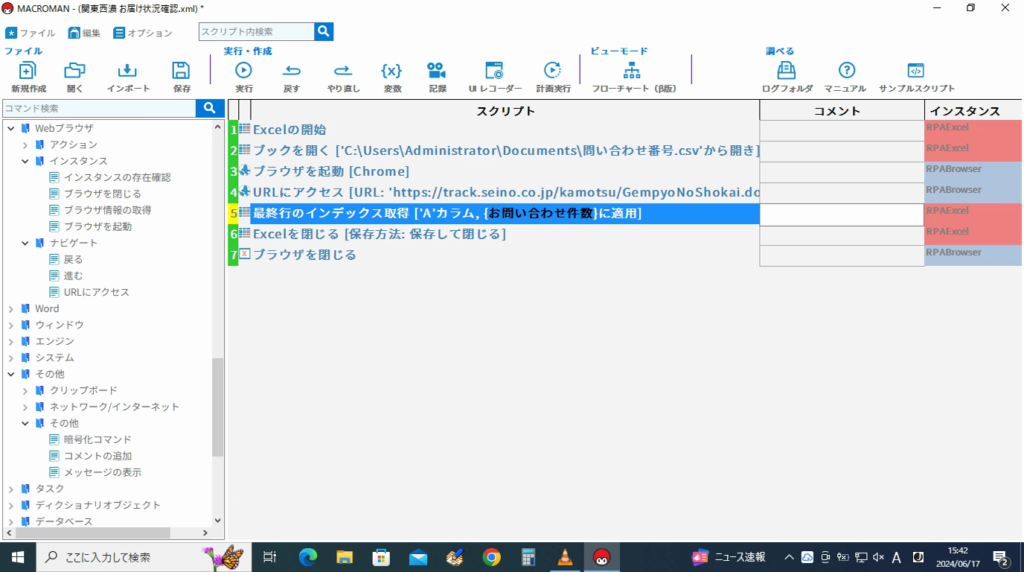
一覧に「最終行のインデックス取得」が追加されます。
次に最終行数を表示したいので「アクション」の中から「その他l」をクリック。
展開された中から「その他」をクリック。
その他の中から「メッセージの表示」をクリック。
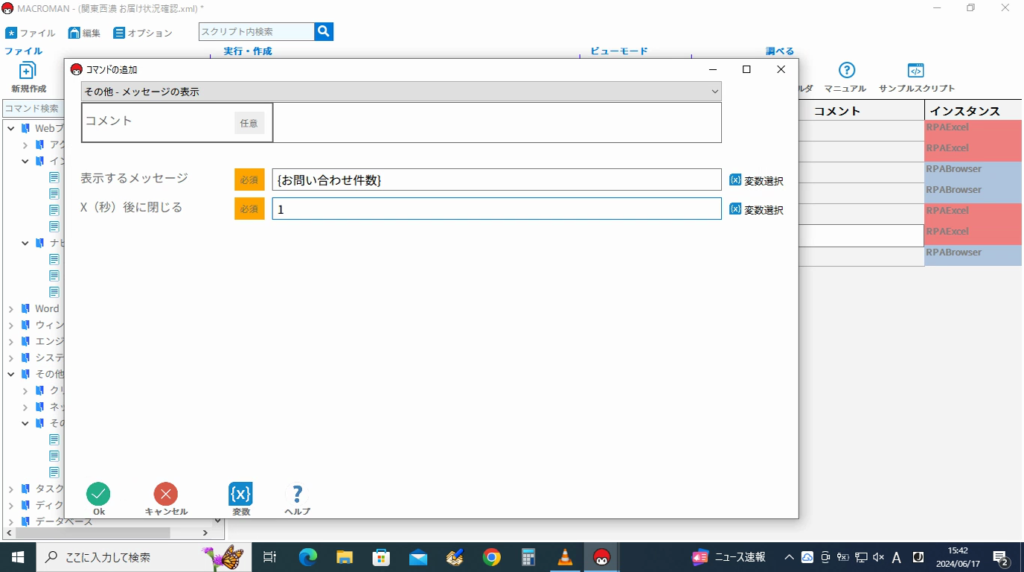
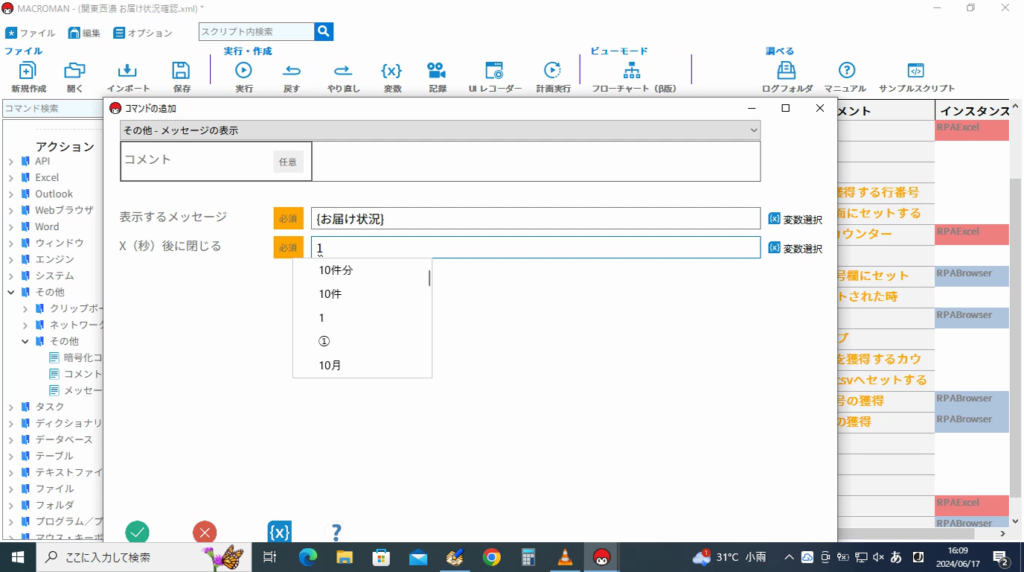
step.29
「メッセージの表示」画面が表示されます。
| 表示するメッセージ | 右側の▽を押下して「お問い合わせ件数」を選択。 |
| X(秒)後に閉じる | 「1」を入力 |
最後に「OK」ボタンをクリック。
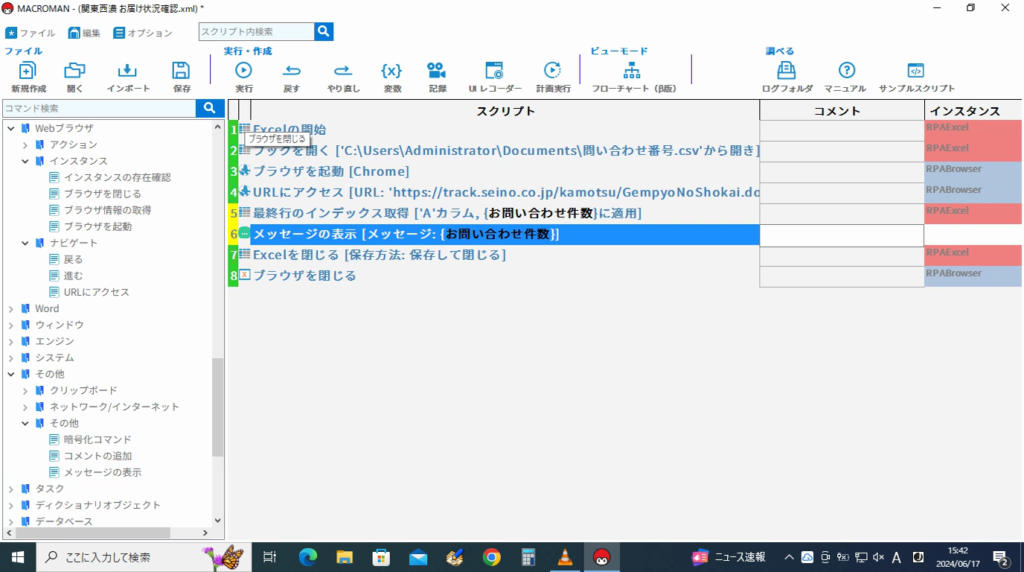
step.30
一覧に「メッセージの表示」が追加されます。
「最終行のインデックス取得」の下に「メッセージの表示」が来るようにして下さい。
step.31
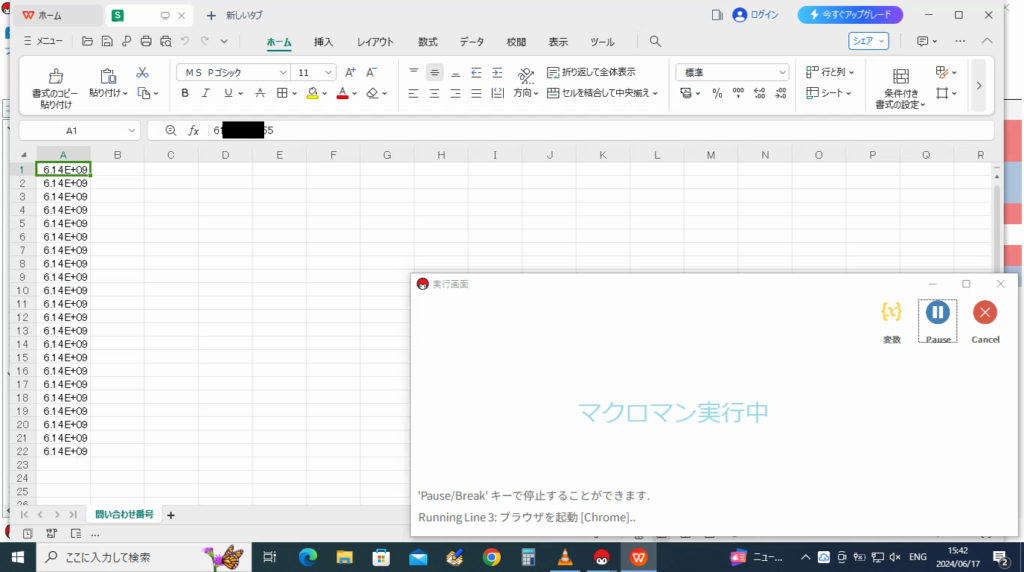
今までの流れを確認するので画面上の「実行」ボタンをクリック。

step.32
「問い合わせ件数.csv」が表示されます。
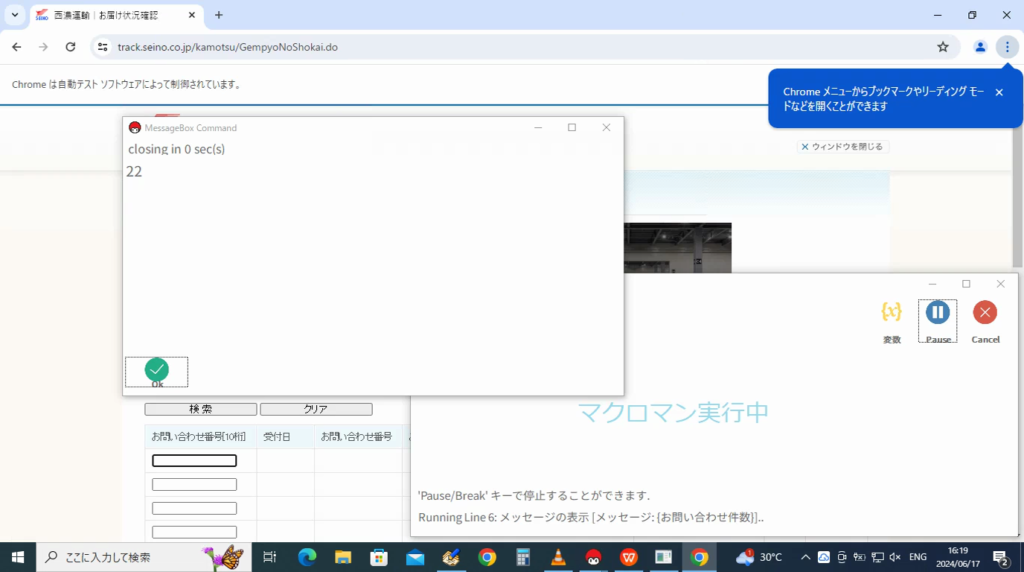
step.33
最終行のインデックス取得で獲得した「22」が表示されます。
1秒後に勝手に閉じてくれるので、そのまま。
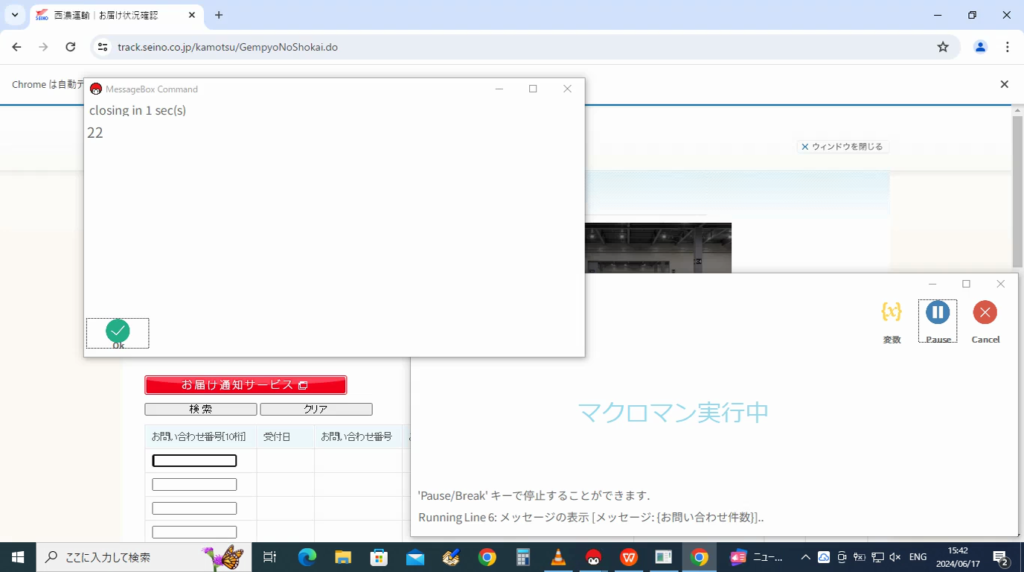
step.34
次に「関東西濃 お届け状況確認」が表示されます。
そのままの状態で待っていれば、勝手に終了します。

step.35
次に最終行数分、データを読み込みたいので
「フロー」の中から「繰り返し(Loop)」をクリック。
展開された中から「ループ開始(回数指定)」をクリック。

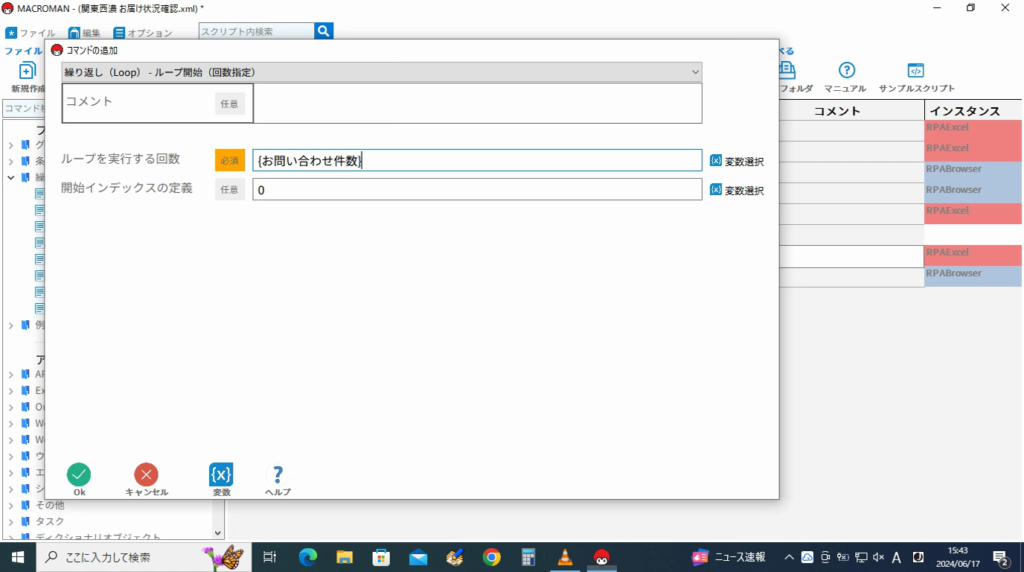
step.36
「ループ開始(回数指定)」画面が表示されます。
| ループを実行する回数 | 右側の▽を押下して「お問い合わせ件数」を選択。 |
最後に「OK」ボタンをクリック。
step.37
一覧に「Timeesの繰り返し」から「ループの終了」までの3行が追加されます。
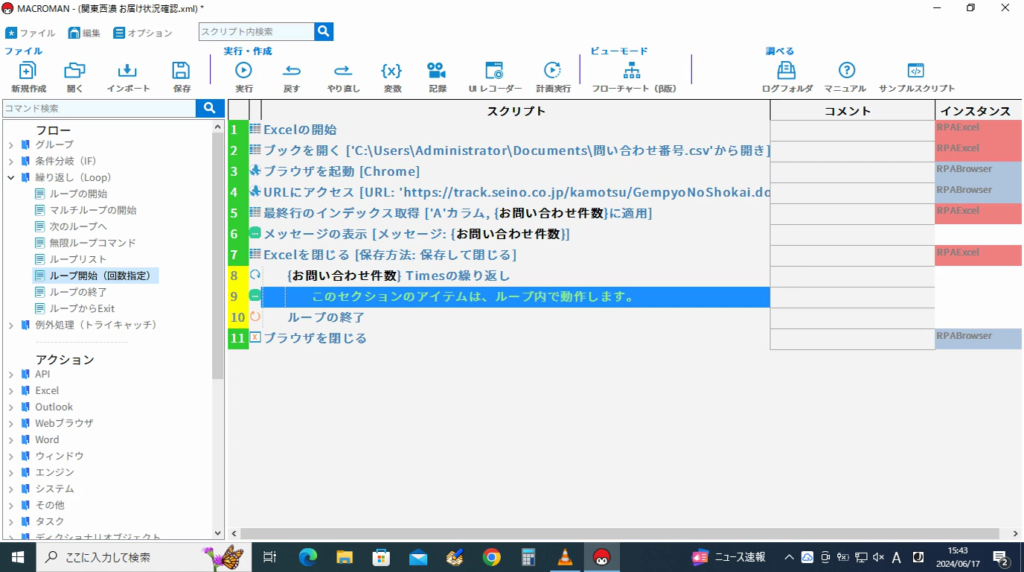
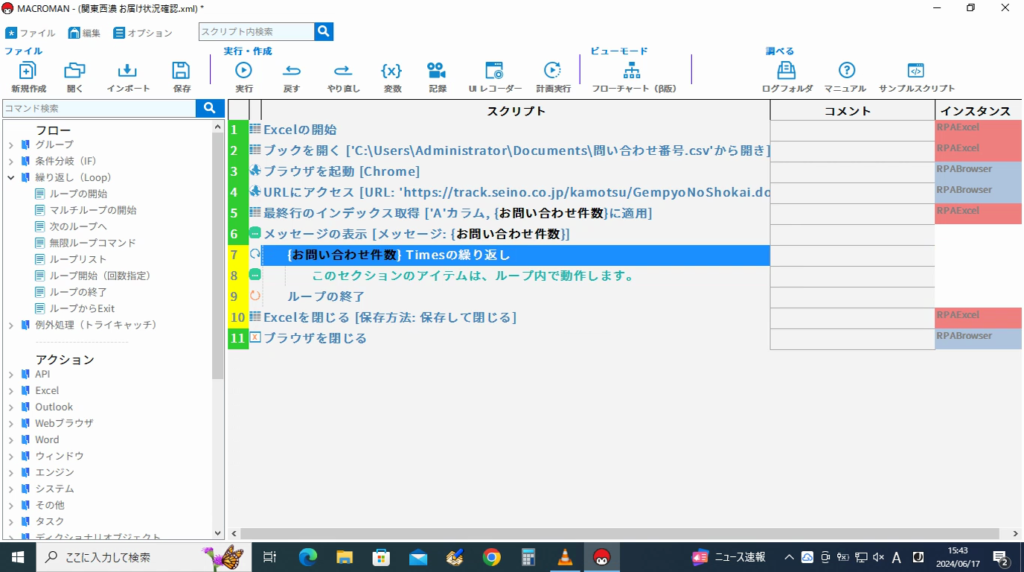
step.38
「Excelを閉じる」と「Timeesの繰り返し」から「ループの終了」までの順番が違うので「Excelを閉じる」が下に来るように順番を変更して下さい。
step.39
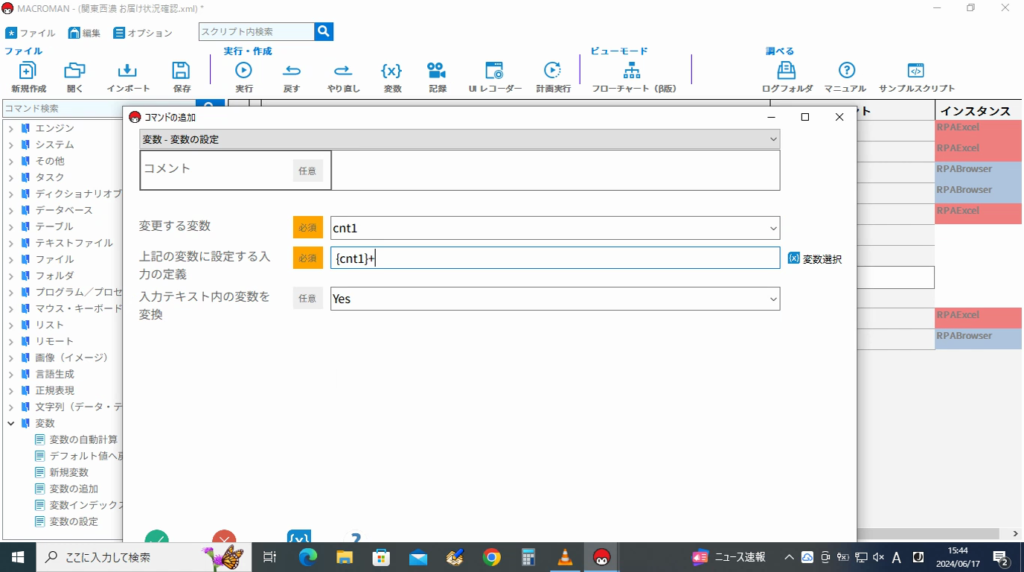
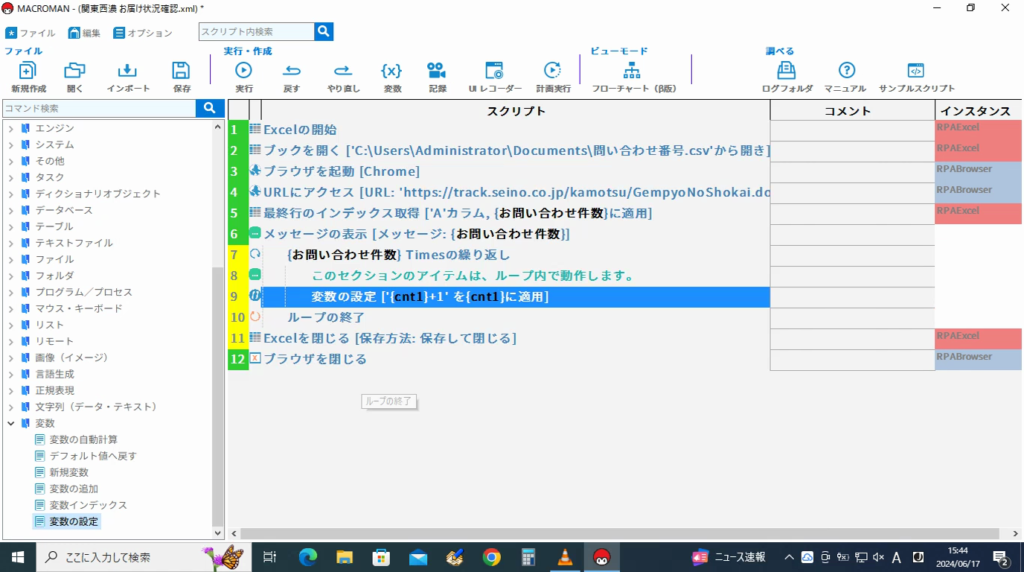
次に変数「cnt1」をカウントアップしたいので「アクション」の中から「変数l」をクリック。
展開された中から「変数の設定」をクリック。
「変数の設定」画面が表示されるので
| 変更する変数 | 右側の▽を押下して「cnt1」を選択。 |
| 上記の変数に設定する入力の定義 | 右側の▽を押下して「cnt1」を選択後、「+1」を追記。 |
最後に「OK」ボタンをクリック。
step.40
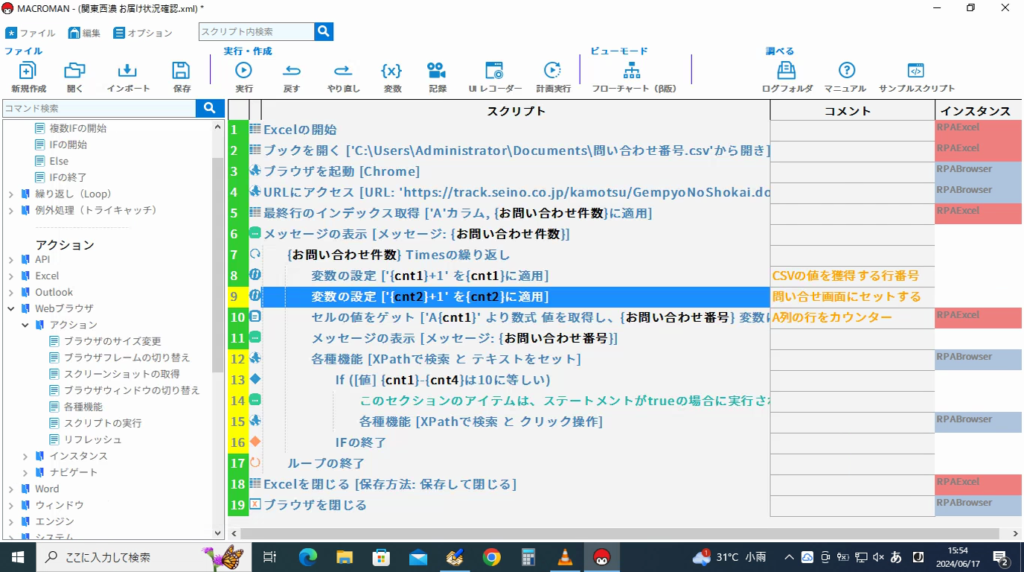
一覧に「変数の設定」が追加されます。
step.41
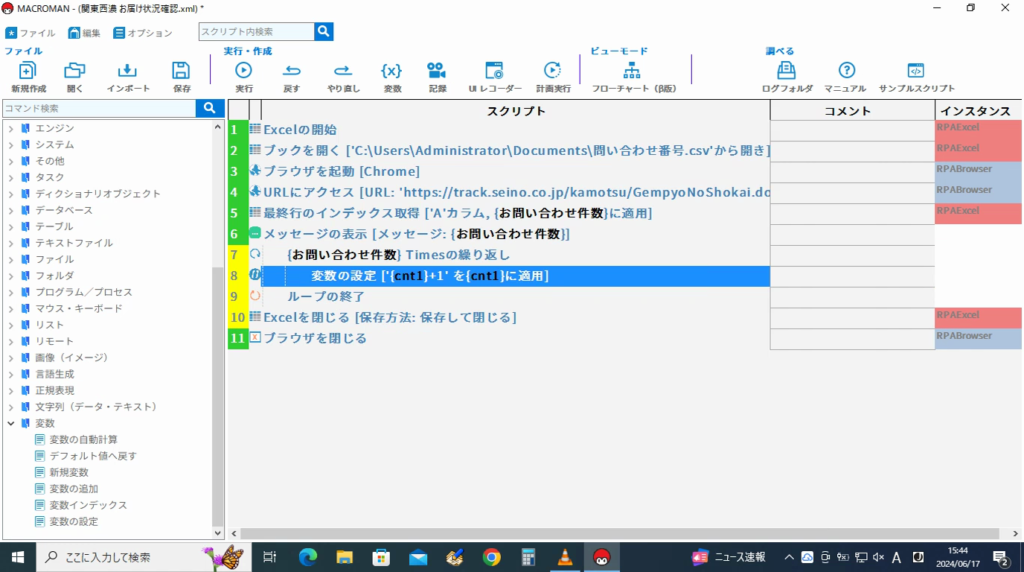
一覧の中のコメント「このセクションのアイテムは、ループ内で動作します。」が要らないので削除。
step.42
次にcsvから問い合わせ番号を獲得したので「アクション」の中から「Excel」をクリック。
展開された中から「セル」をクリック。
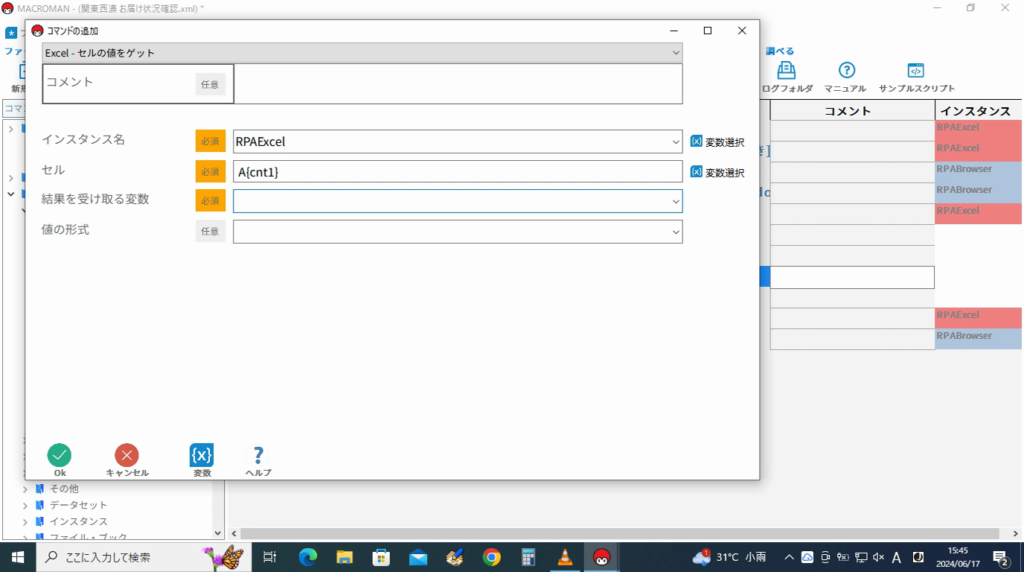
セルの中から「セルの値をゲット」をクリック。

step.43
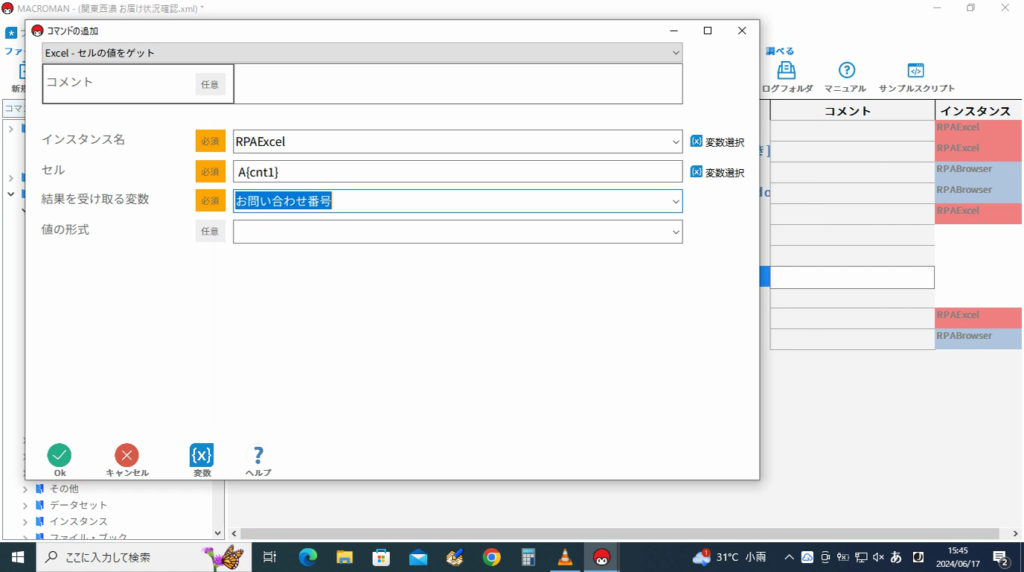
「セルの値をゲット」画面が表示されるので
| インスタンス名 | 「RPAExcel」を選択。 |
| セル | A{cnt1}を入力 ※Aの後ろにカント数がセットされるので、A1→A2→A3となっていきます。 |
| 結果を受け取る変数 | 「お問い合わせ番号」にしたいけど作成されて無かったので下段の「変数」ボタンをクリック。 |
| 値の形式 | 「値」を選択。 |
step.44
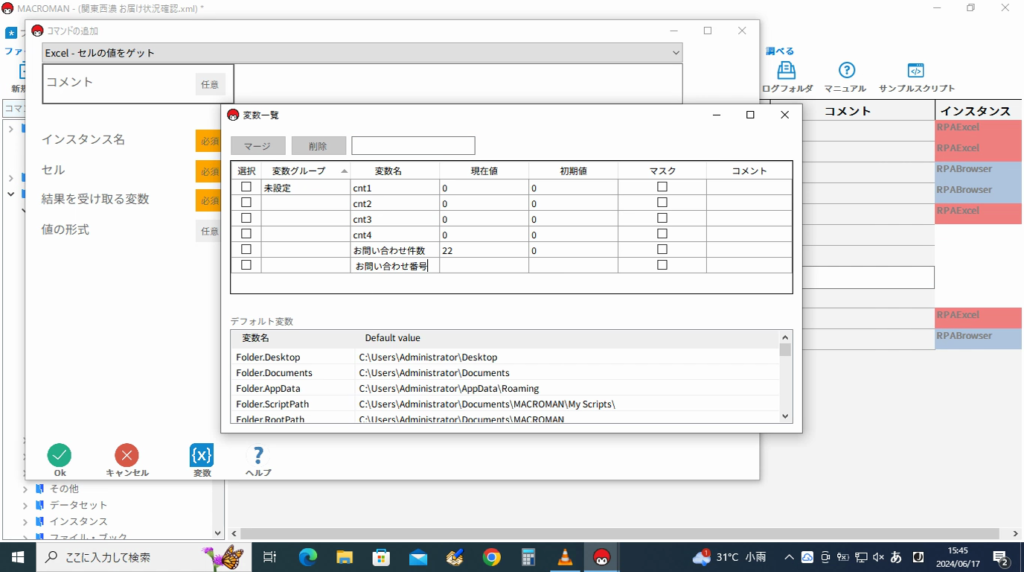
「変数一覧」画面が表示されます。
「お問い合わせ件数の下にカーソルを合せると「+」が表示されるのでクリック。
空白行が追加されるので変数名に「お問い合わせ番号」を入力。
右上の「×」ボタンをクリック。
step.45
再度「セルの値をゲット」画面が表示されるので
| インスタンス名 | 「RPAExcel」を選択。 |
| セル | A{cnt1}を入力 ※Aの後ろにカント数がセットされるので、A1→A2→A3となっていきます。 |
| 結果を受け取る変数 | 「お問い合わせ番号」 |
| 値の形式 | 「値」を選択。 |
最後に「OK」ボタンをクリック。
step.46
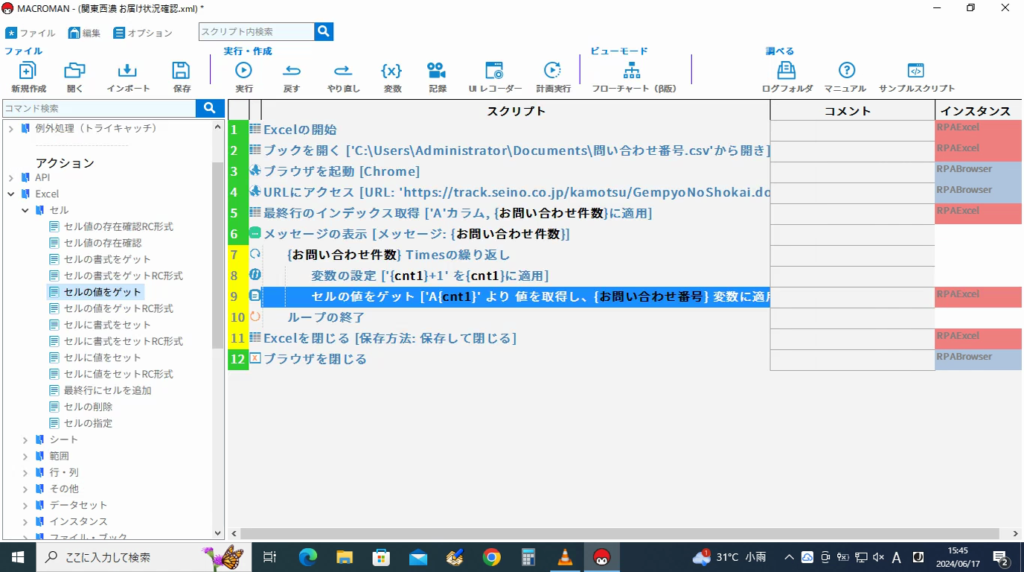
一覧に「セルの値をゲット」が追加されます。
step.47
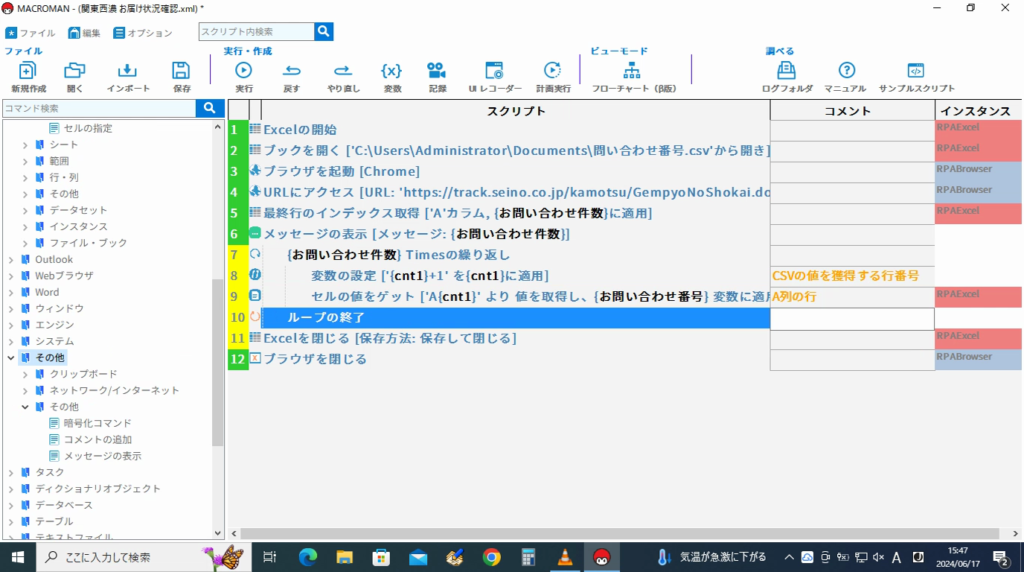
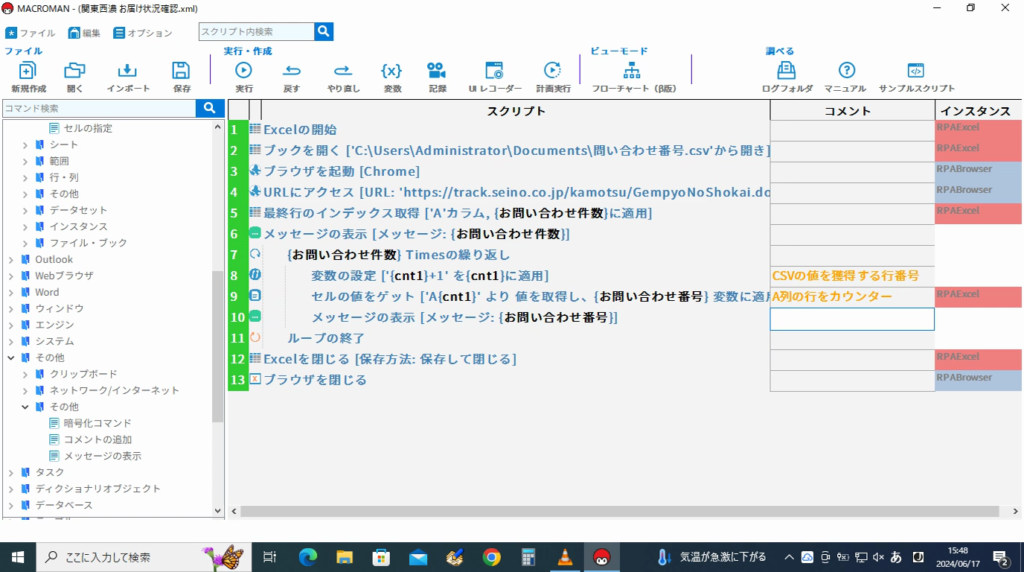
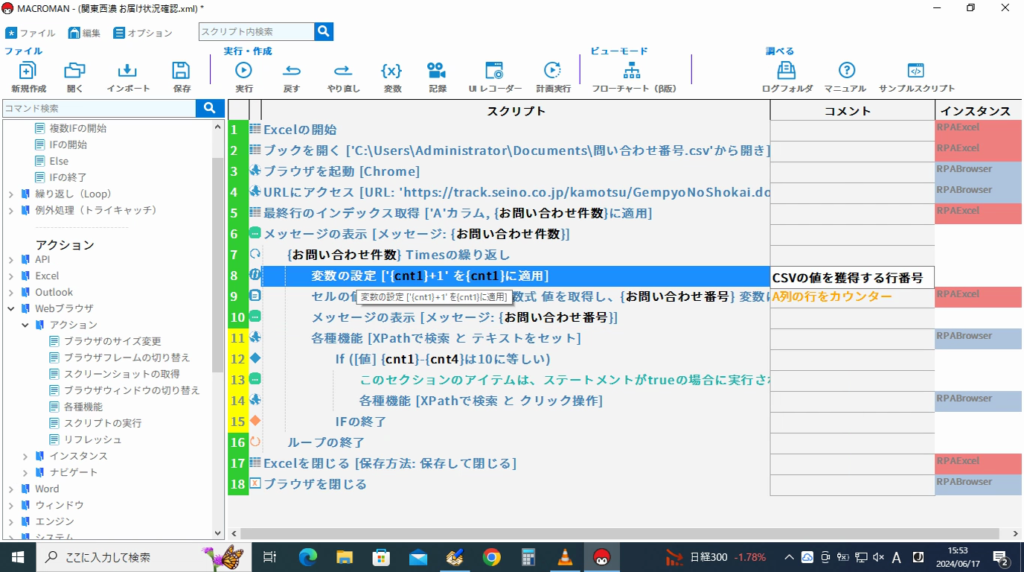
スクリプトの右列のコメント欄に
| 変数の設定 | 「CSVの値を獲得する行番号」と入力して下さい。 |
| セルの値をゲット | 「A列の行番号」と入力して下さい。 |

step.48
正しく「お問い合わせ番号」が獲得出来ているか確認したいので「メッセージの表示」を追加します。
「アクション」の中から「その他」をクリック。
展開された中から「その他」をクリック。
その他の中から「メッセージの表示」をクリック。
step.49
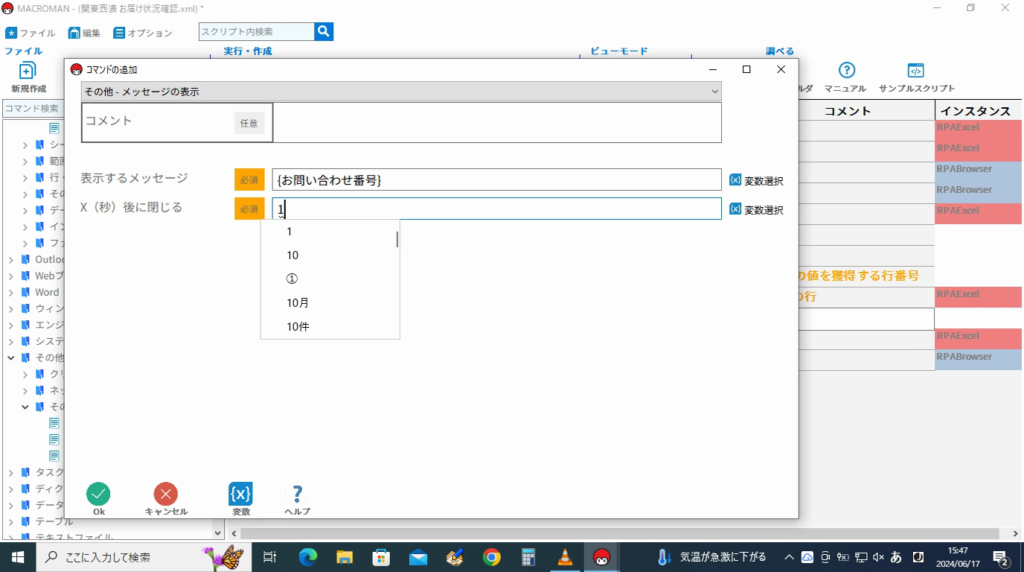
「メッセージの表示」画面が表示されます。
| 表示するメッセージ | 右側の▽を押下して「お問い合わせ番号」を選択。 |
| X(秒)後に閉じる | 「1」を入力。 |
最後に「OK」ボタンをクリック。
step.50
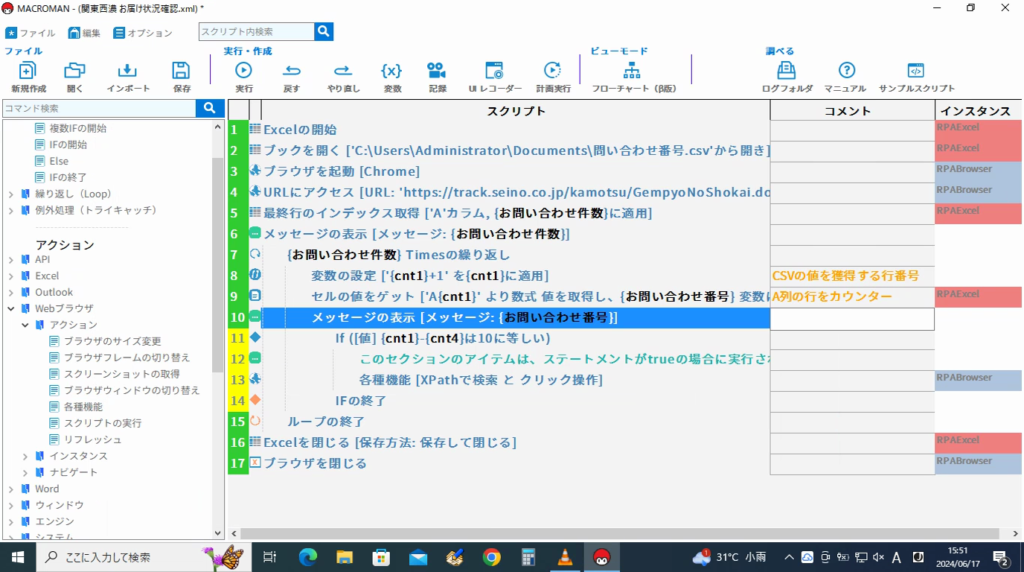
一覧に「メッセージの表示」が追加されます。
今までの流れを確認するので画面上の「実行」ボタンをクリック。
step.51
「お問い合わせ番号.csv」が表示されます。
step.52
「お届け状況確認」画面が表示されます。
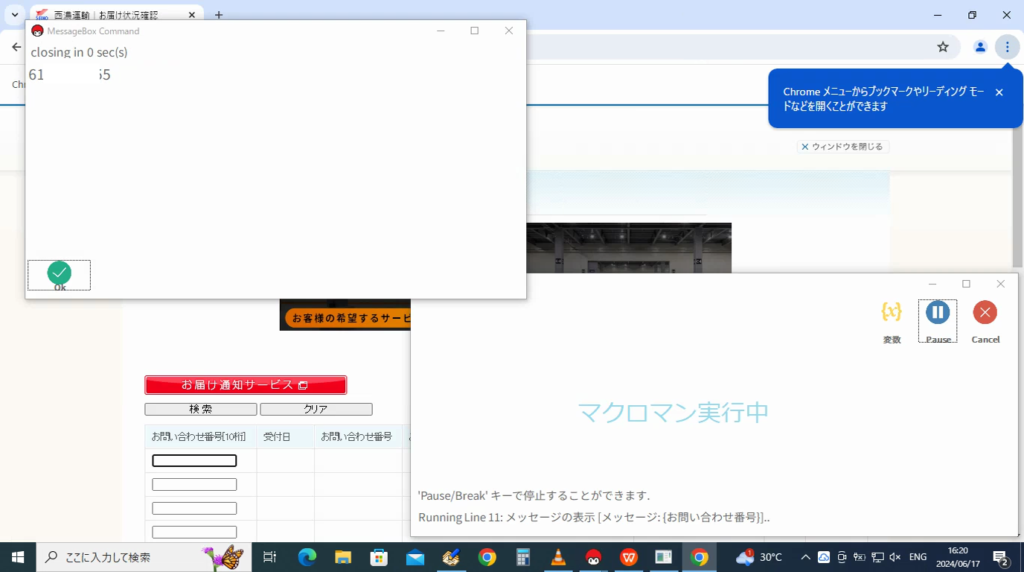
step.53
「お問い合わせ番号」が表示されました。
step.54
次に問い合わせ画面の入力欄が10件分なので、10件分セットされたか確認するためIF文を追加します。
「フロー」の中から「条件分岐(IF)」をクリック。
展開された中から「IFの開始」をクリック。
step.55
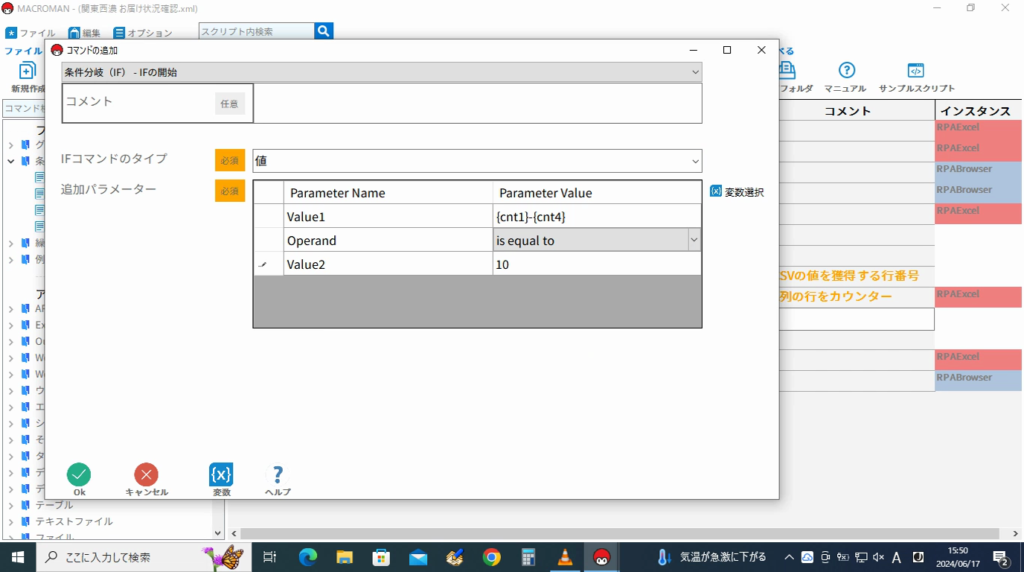
「IFの開始」画面が表示されるので
| IFコマンドのタイプ | 右側の▽を押下して「値」を選択。 |
| Value1 | {cnt1}-{cnt4} を入力。 |
| Operand | 右側の▽を押下して「is equal to」を選択 |
| Value2 | 10を入力 |
最後に「OK」ボタンをクリック。
step.56
次に「検索」ボタンを押下するので「アクション」の中から「Webブラウザ」をクリック。
展開された中から「アクション」をクリック。
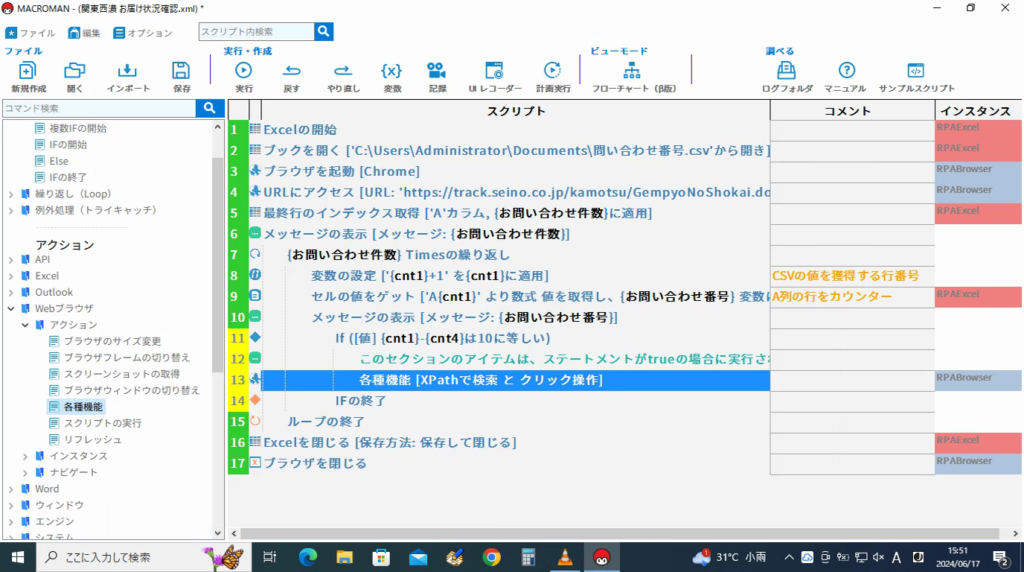
アクション中から「各種機能」をクリック。
step.57
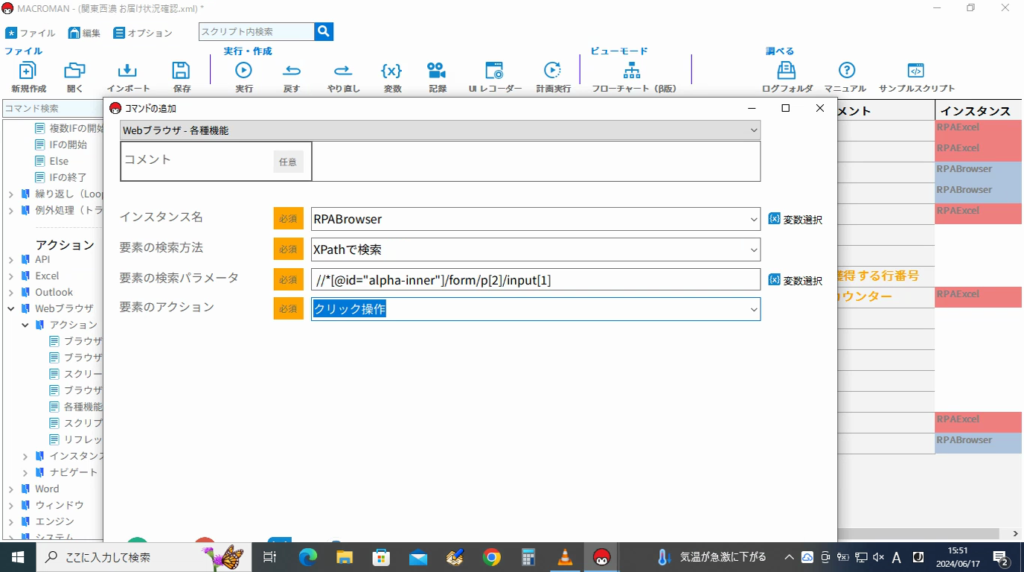
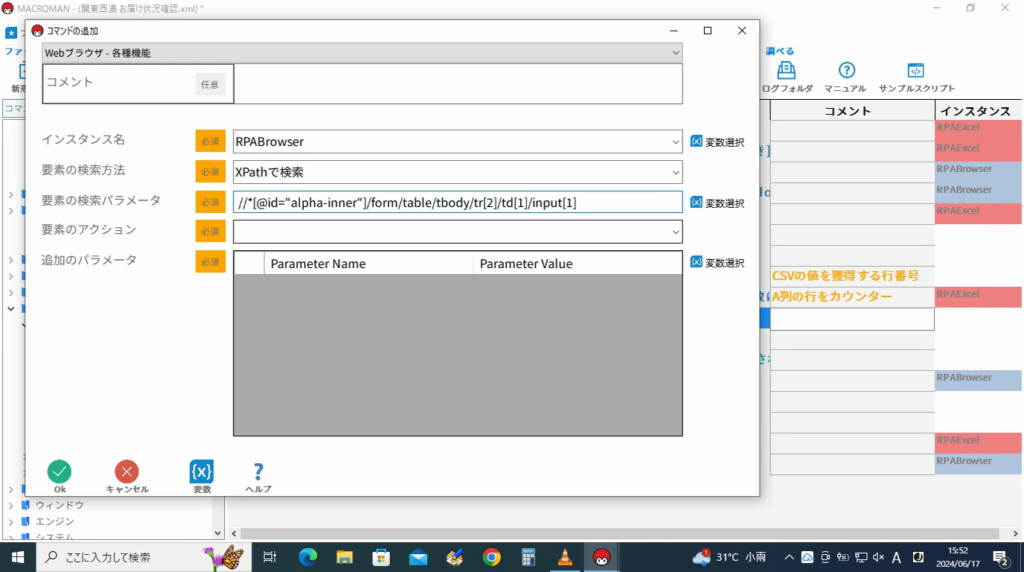
「各種機能」画面が表示されるので
| インスタンス名 | 「RPABrowser」を選択。 |
| 要素の検索方法 | 右側の▽を押下して「XPathを検索」を選択。 |
| 要素の検索パラメータ | //*[@id=”alpha-inner”]/form/p[2]/input[1] |
| 要素アクション | 右側の▽を押下して「クリック操作」を選択。 |
最後に「OK」ボタンをクリック。
step.58
一覧に「各種機能」が追加されます。
これで、問い合わせ番号欄に10件セットされた場合に「検索」ボタンをクリックする動作が完成しました。
step.59
今度は、csvから獲得した「問い合わせ番号」を画面の入力欄にセットするので「アクション」の中から「Webブラウザ」をクリック。
展開された中から「アクション」をクリック。
アクション中から「各種機能」をクリック。
step.60
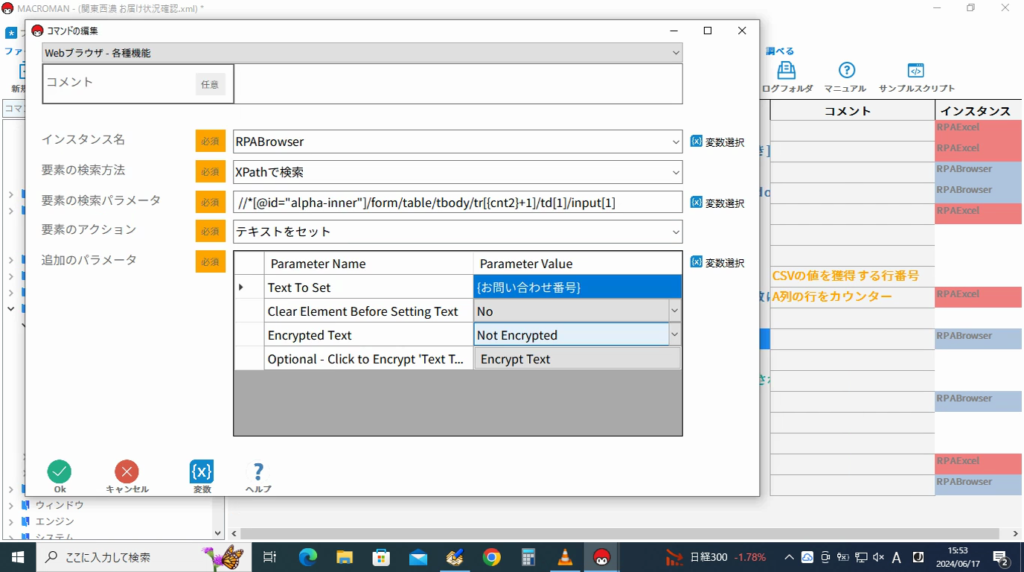
「各種機能」画面が表示されるので
| インスタンス名 | 「RPABrowser」を選択。 |
| 要素の検索方法 | 右側の▽を押下して「XPathを検索」を選択。 |
| 要素の検索パラメータ | //*[@id=”alpha-inner”]/form/table/tbody/tr[2]/td[1]/input |
step.61
tr[2]をカウンターの値を使用した変数にしたいのでtr[{cnt2}+1] へ変更します。
| Text To Set | 右側の▽を押下して{お問い合わせ番号}を選択。 |
最後に「OK」ボタンをクリック。
step.62
一覧に「各種機能」が追加されます。
step.63
変数のcnt1をカントアップした時と同じようにcnt2をカントアップします。
「アクション」の中から「変数」をクリック。
展開された中から「変数の設定」をクリック。
「変数の設定」画面が表示されるので
| 変更する変数 | 右側の▽を押下して「cnt2」を選択。 |
| 上記の変数に設定する入力の定義 | 右側の▽を押下して「cnt2」を選択後、「+1」を追記。 |
最後に「OK」ボタンをクリック。
step.64
{cnt1}-{cnt4}の差が10のIF文の中にあるコメントを行を削除して下さい。
また、コメント欄に「検索ボタン」と入力して下さい。

step.65
今度は、10件分の「お届け状況」を獲得したいので「フロー」の中から「繰り返し(Loop)」をクリック。
展開された中から「ループ開始(回数指定)」をクリック。
step.66
「ループ開始(回数指定)」画面が表示されるので
| ループを実行する回数 | {cnt1}-{cnt4}を入力 |
最後に「OK」ボタンをクリック。

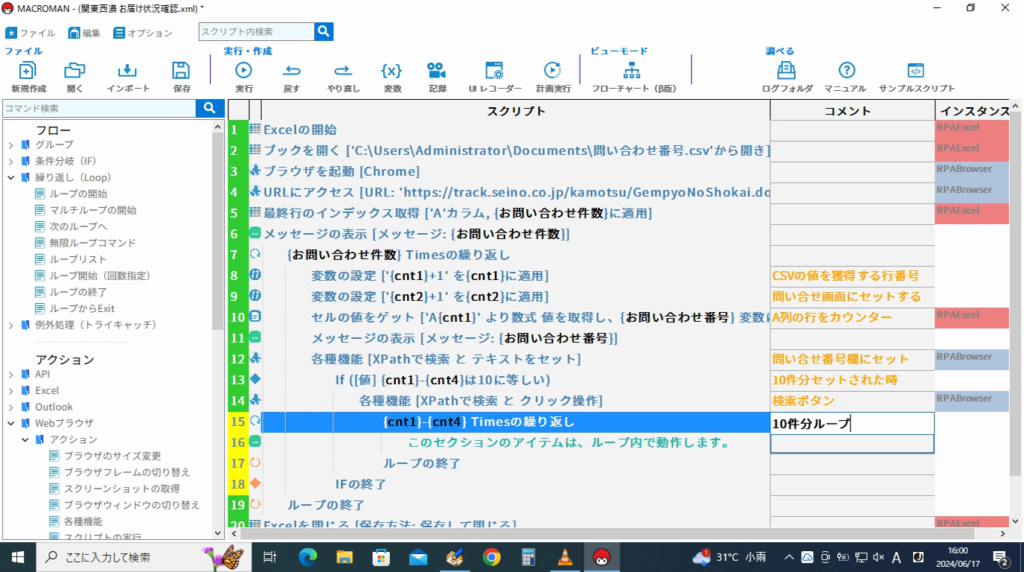
step.67
「Timesの繰り返し」のコメント欄に「10件分ループ」と入力して下さい。
次に「Timesの繰り返し」の中のコメント行を削除して下さい。
step.68
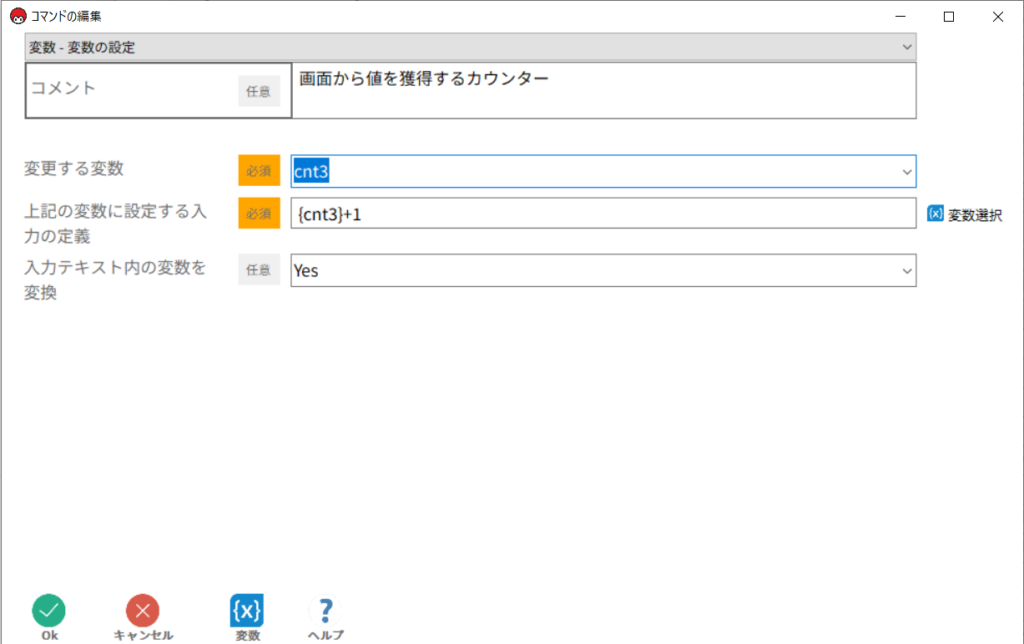
次に画面の値を獲得する時に使用するカウンターをカウントアップしたいので「アクション」の中から「変数l」をクリック。
展開された中から「変数の設定」をクリック。
「変数の設定」画面が表示されるので
| コメント | 画面から値を獲得するカウンター |
| 変更する変数 | 右側の▽を押下して「cnt3」を選択。 |
| 上記の変数に設定する入力の定義 | 右側の▽を押下して「cnt3」を選択後、「+1」を追記。 |
最後に「OK」ボタンをクリック。
step.69
次に画面の値をcsvへセットするカウンターをカントアップしたいので同じように作成します。
「アクション」の中から「変数l」をクリック。
展開された中から「変数の設定」をクリック。
「変数の設定」画面が表示されるので
| コメント | 画面から値を獲得するカウンター |
| 変更する変数 | 右側の▽を押下して「cnt4」を選択。 |
| 上記の変数に設定する入力の定義 | 右側の▽を押下して「cnt4」を選択後、「+1」を追記。 |
最後に「OK」ボタンをクリック。

step.70
一覧が下記のようになっていれば大丈夫です。
step.71
次に「お問い合わせ番号」欄からお問い合わせ番号を獲得するので「アクション」の中から「Webブラウザ」をクリック。
展開された中から「アクション」をクリック。
アクション中から「各種機能」をクリック。
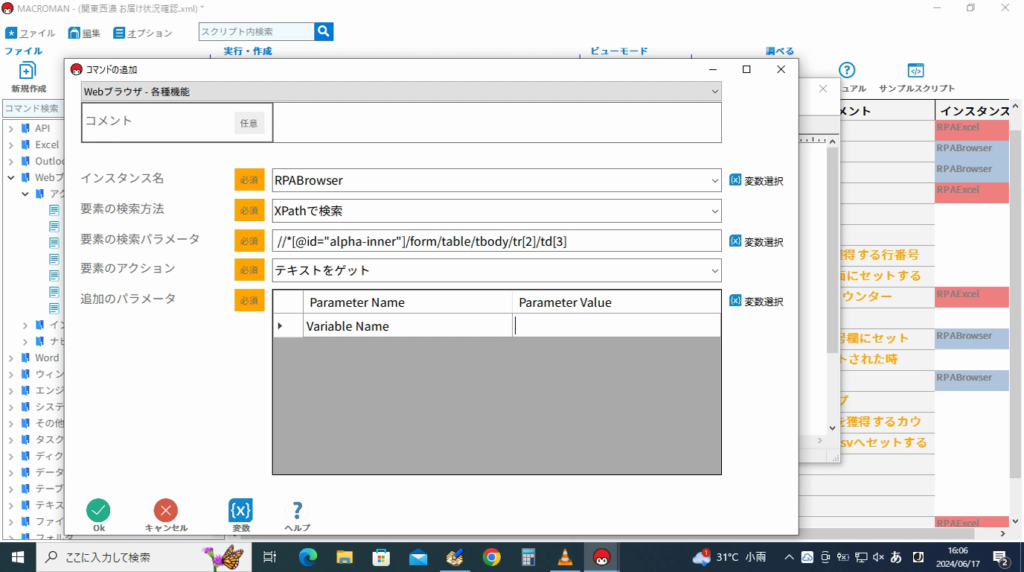
「各種機能」画面が表示されるので
| インスタンス名 | 「RPABrowser」を選択。 |
| 要素の検索方法 | 右側の▽を押下して「XPathを検索」を選択。 |
| 要素の検索パラメータ | //*[@id=”alpha-inner”]/form/table/tbody/tr[2]/td[3] |
| 要素アクション | 右側の▽を押下して「テキストをゲット」を選択。 |
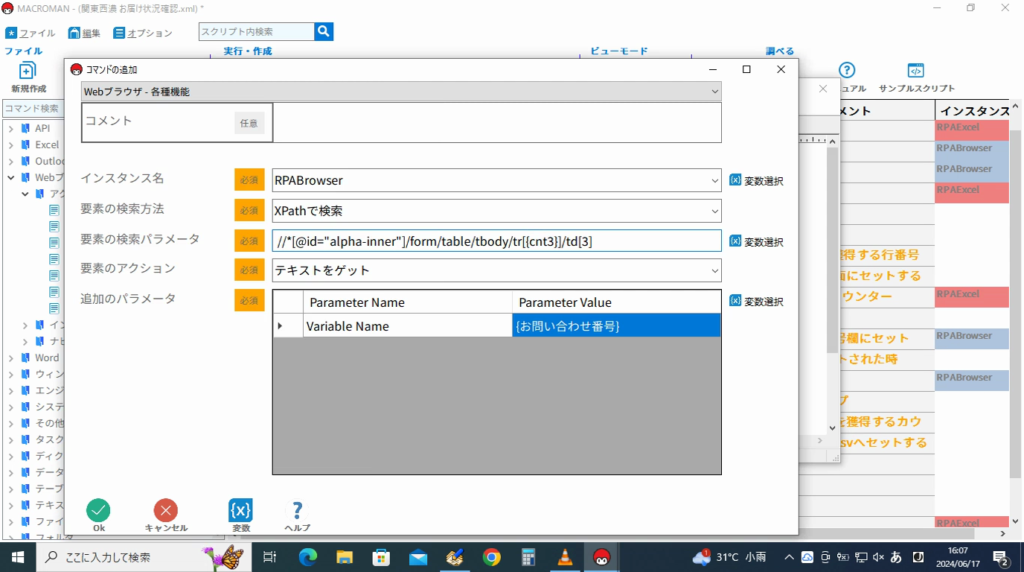
step.72
tr[2]をカウンターの値を使用した変数にしたいのでtr[{cnt3}+1] へ変更します。
| Variable Name | 右側の▽を押下して{お問い合わせ番号}を選択。 |
最後に「OK」ボタンをクリック。
step.73
一覧画面に戻って来ますので、コメントを「問い合わせ番号の獲得」を入力します。
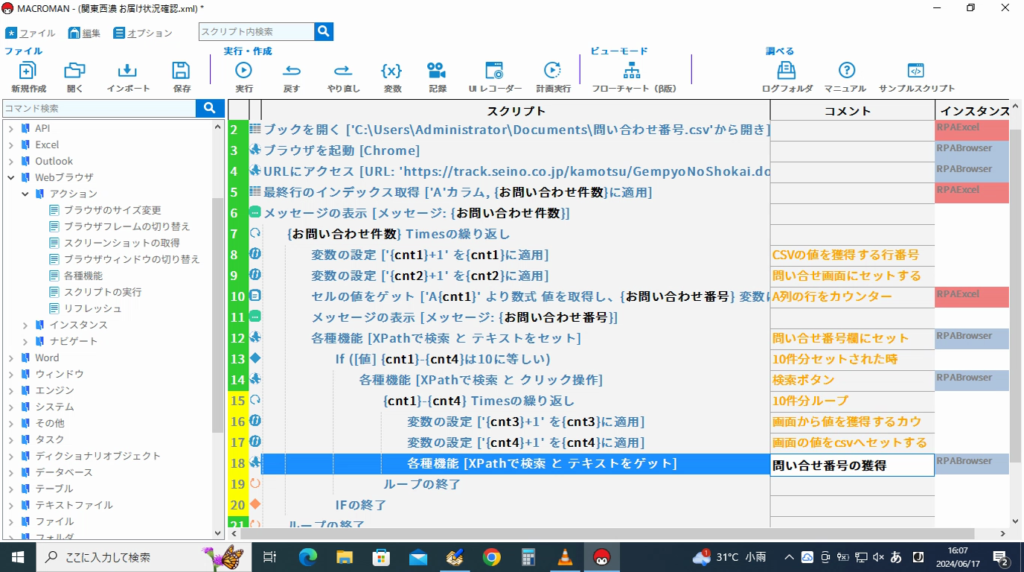
step.74
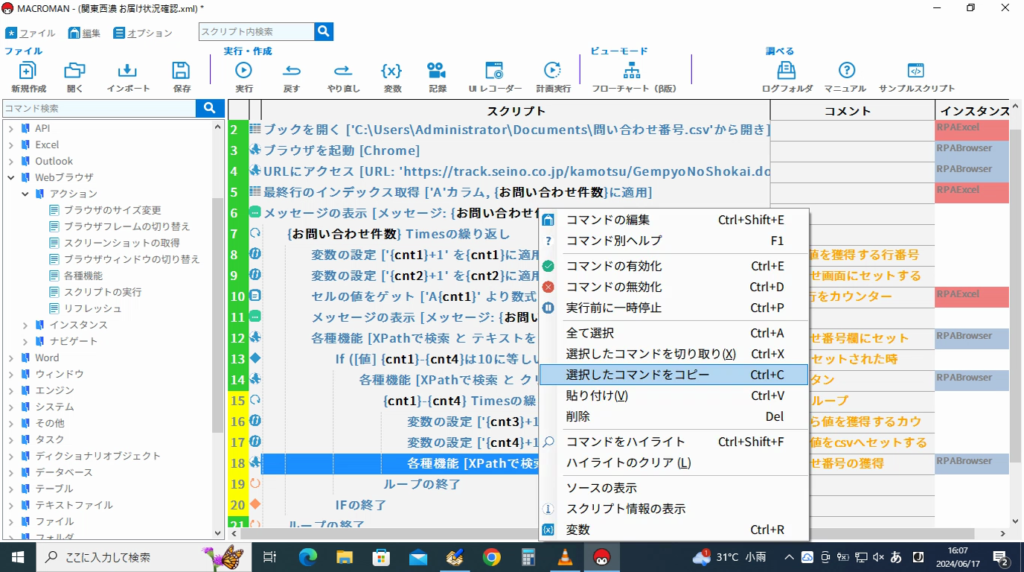
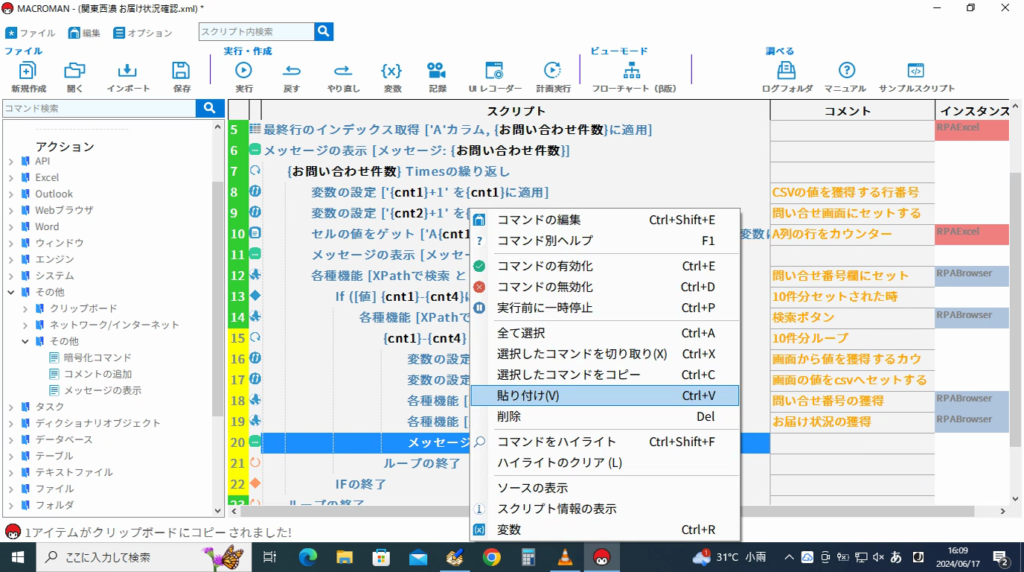
同じように「お届け状況」も獲得したいので右クリックして「選択したコマンドをコピー」を選択します。
貼り付けをした後にコピーしたコマンドをダブルクリック。
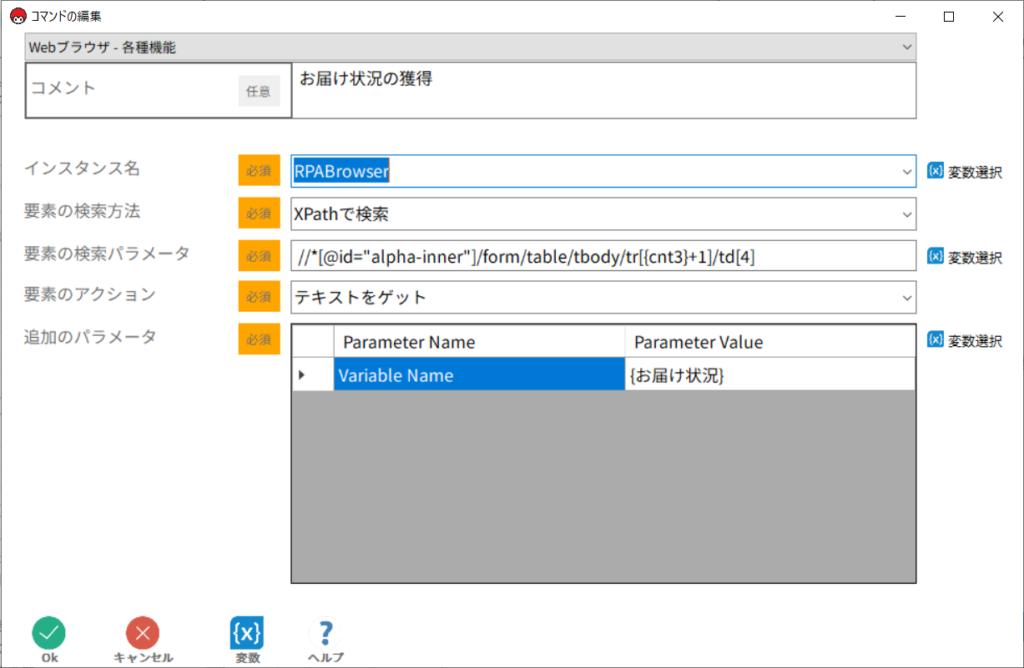
step.75
「お届け状況」ように変更します。
| コメント | お届け状況の獲得 |
| インスタンス名 | 「RPABrowser」 |
| 要素の検索方法 | 「XPathを検索」 |
| 要素の検索パラメータ | //*[@id=”alpha-inner”]/form/table/tbody/tr[{cnt3}+1]/td[4] |
| 要素アクション | 「テキストをゲット」 |
| Variable Name | {お届け状況} |
最後に「OK」ボタンをクリック。
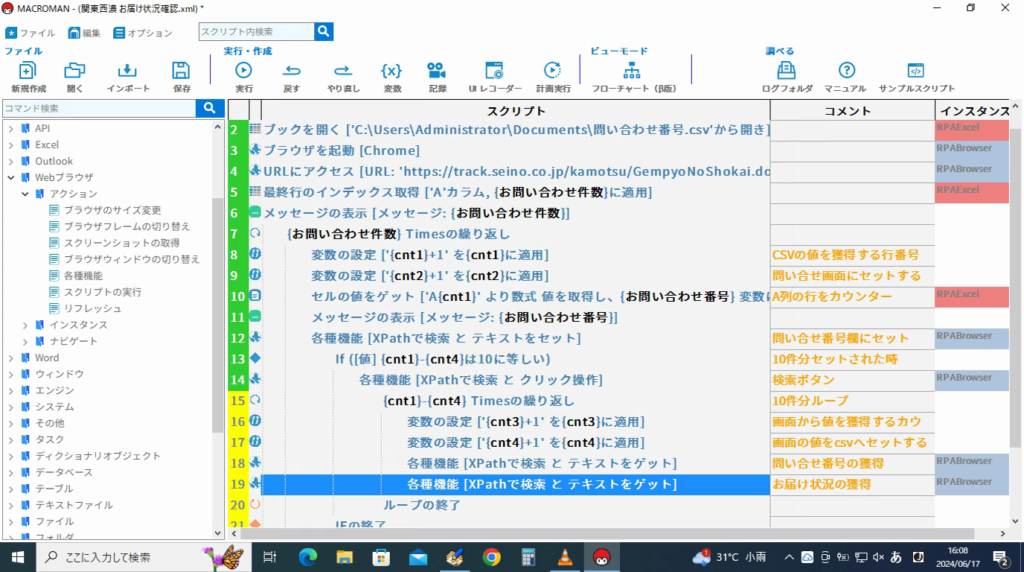
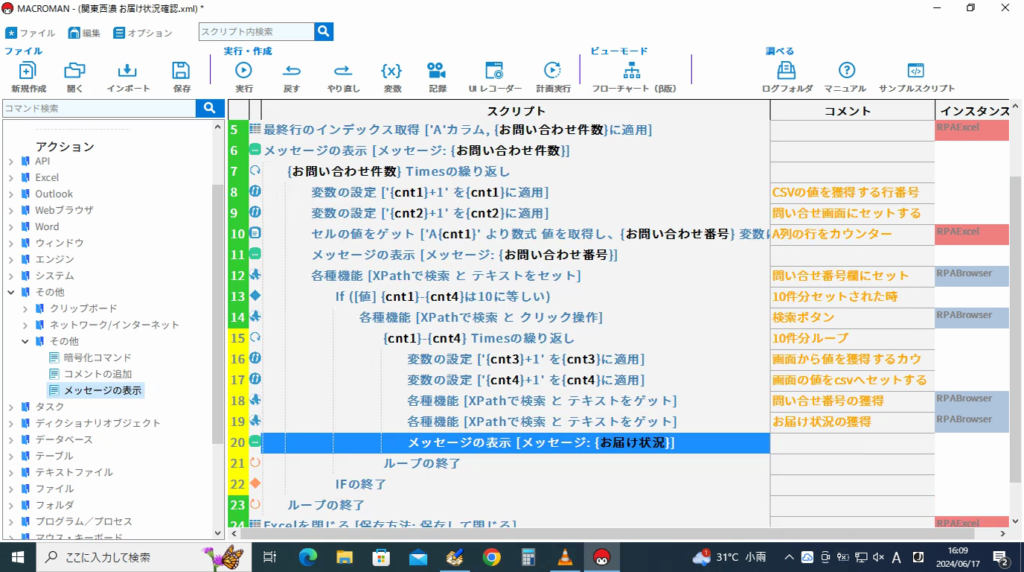
step.76
一覧画面に戻って来ますので、画面の通りになっていれば大丈夫です。
step.77
お届け状況が正しく獲得出来ているか「メッセージの表示」を追加します。
「アクション」の中から「その他l」をクリック。
展開された中から「その他」をクリック。
その他の中から「メッセージの表示」をクリック。
「メッセージの表示」画面が表示されます。
| 表示するメッセージ | 右側の▽を押下して「お届け状況」を選択。 |
| X(秒)後に閉じる | 「1」を入力 |
最後に「OK」ボタンをクリック。
step.78
一覧画面に戻って来ますので、画面の通りになっていれば大丈夫です。
step.79
次に「お問い合わせ番号」を正しく獲得出来ているか「メッセージの表示」を追加したいので「お届け状況」を右クリックして、貼付けをします。
step.80
先程追加した「メッセージの表示」をダブルクリックして下記の通りに変更します。
| 表示するメッセージ | 右側の▽を押下して「お問い合わせ番号」を選択。 |
| X(秒)後に閉じる | 「1」を入力。 |
最後に「OK」ボタンをクリック。
一覧画面に戻って来ますので、画面の通りになっていれば大丈夫です。

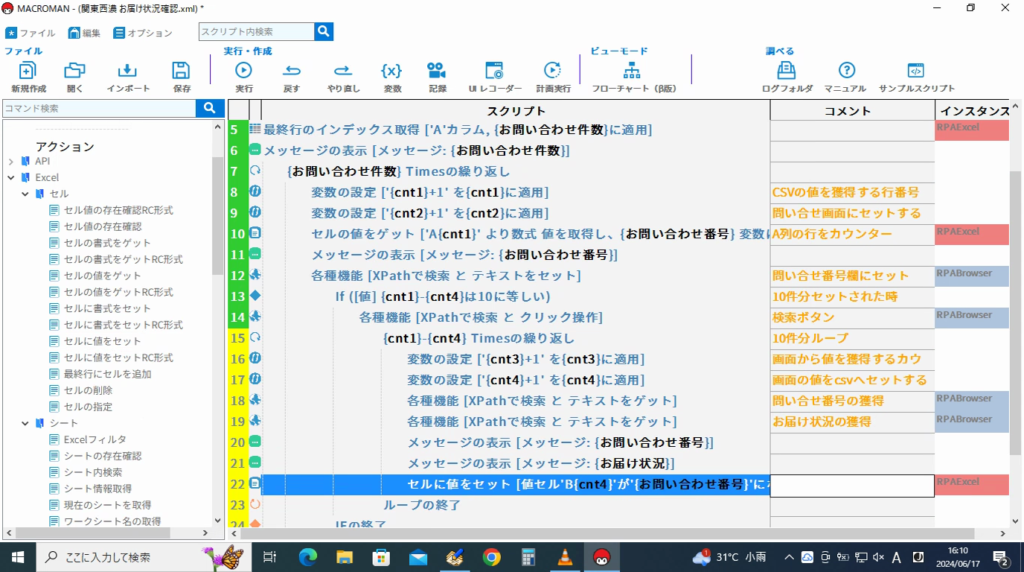
step.81
次にExcel(csv)のセルに値をセットしたいので「アクション」の中から「Excel」をクリック。
展開された中から「セル」をクリック。
セル中から「セルに値をセット」をクリック。
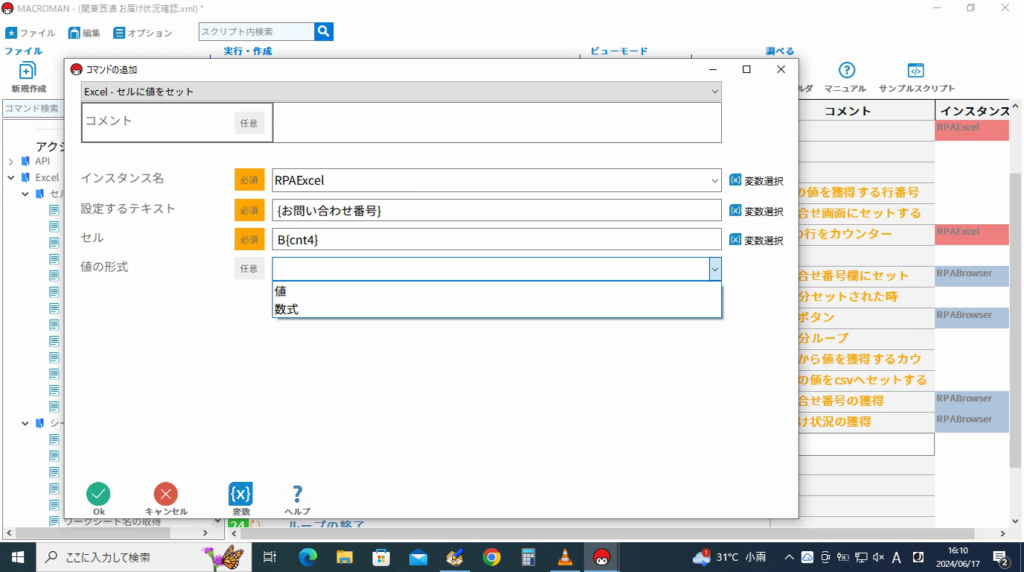
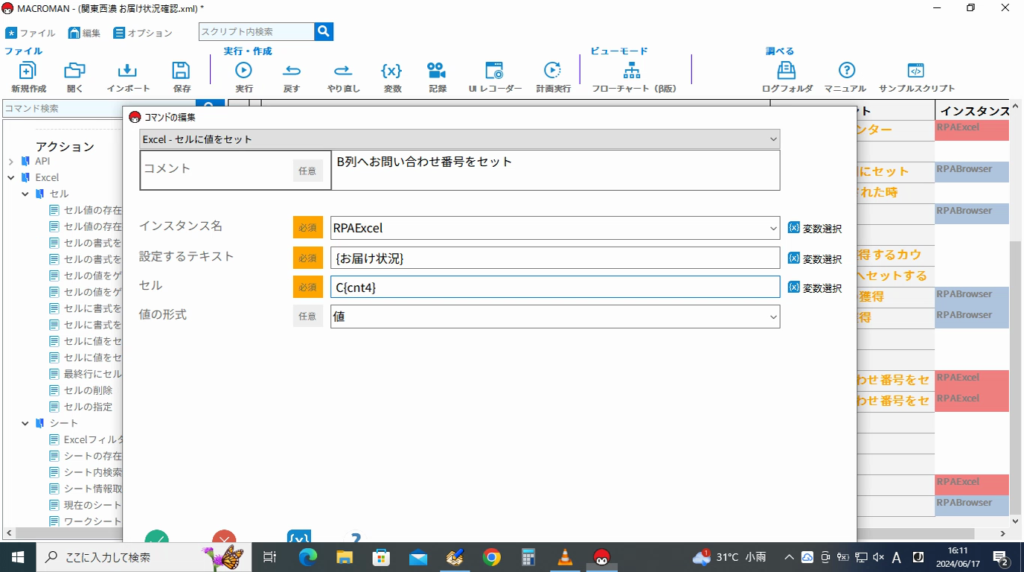
「セルに値をセット」画面が表示されるので
| インスタンス名 | 「RPAExcel」 |
| 設定するテキスト | 右側の▽を押下して「お問い合わせ番号」を選択。 |
| セル | B{cnt4} |
| 値の形式 | 「値」を選択。 |
最後に「OK」ボタンをクリック。
step.82
一覧画面に戻って来ますので、画面の通りになっていれば大丈夫です。
続いて「お届け状況」もセルに値をセットしたいので「アクション」の中から「Excel」をクリック。
展開された中から「セル」をクリック。
セル中から「セルに値をセット」をクリック。
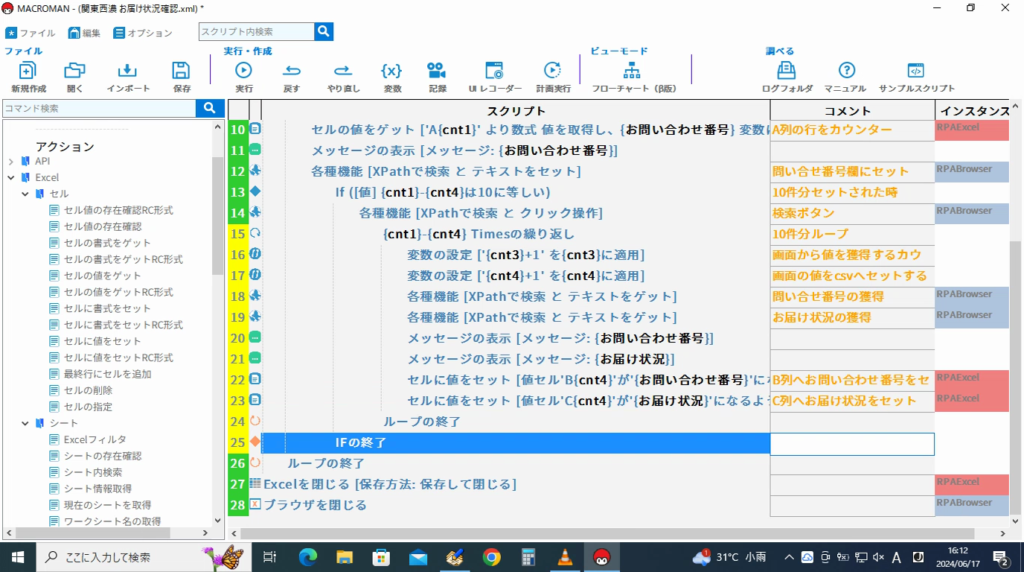
step.83
「セルに値をセット」画面が表示されるので
| インスタンス名 | 「RPAExcel」 |
| 設定するテキスト | 右側の▽を押下して「お届け状況」を選択。 |
| セル | C{cnt4} |
| 値の形式 | 「値」を選択。 |
最後に「OK」ボタンをクリック。
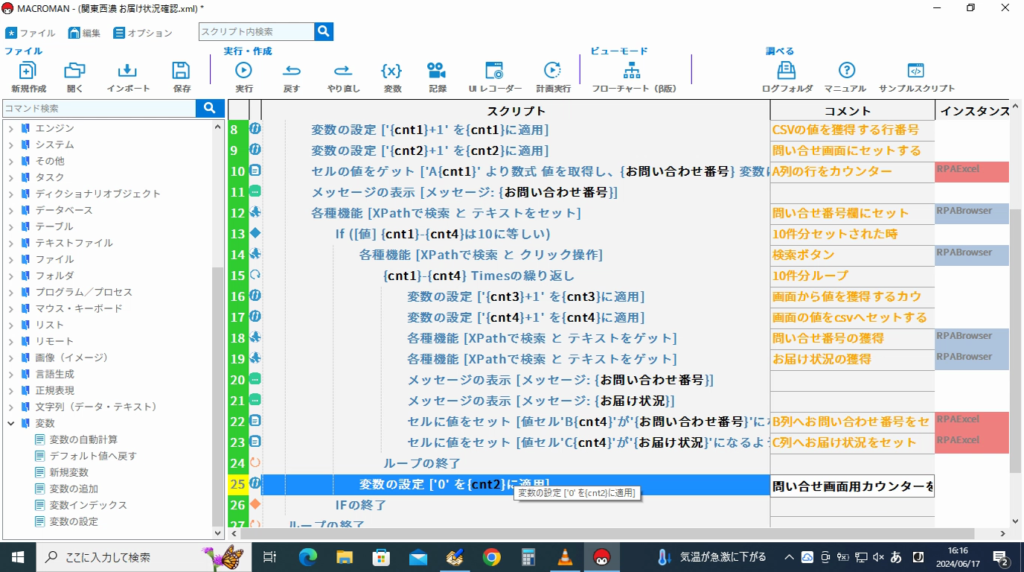
step.84
一覧画面に戻って来ますので、画面の通りになっていれば大丈夫です。
続いて「問い合わせ画面用のカウンター」をリセットしたいので「アクション」の中から「変数」をクリック。
展開された中から「変数の設定」をクリック。
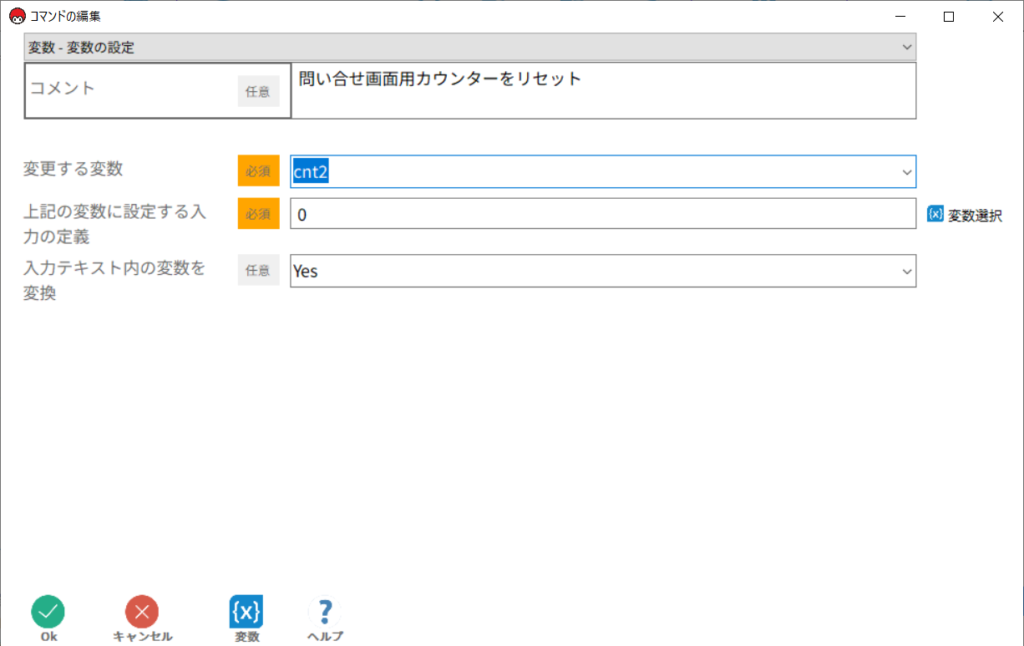
step.85
「変数の設定」画面が表示されるので
| 変更する変数 | 右側の▽を押下して「cnt2」を選択 |
| 上記の変数に設定する入力の定義 | 0 |
最後に「OK」ボタンをクリック。
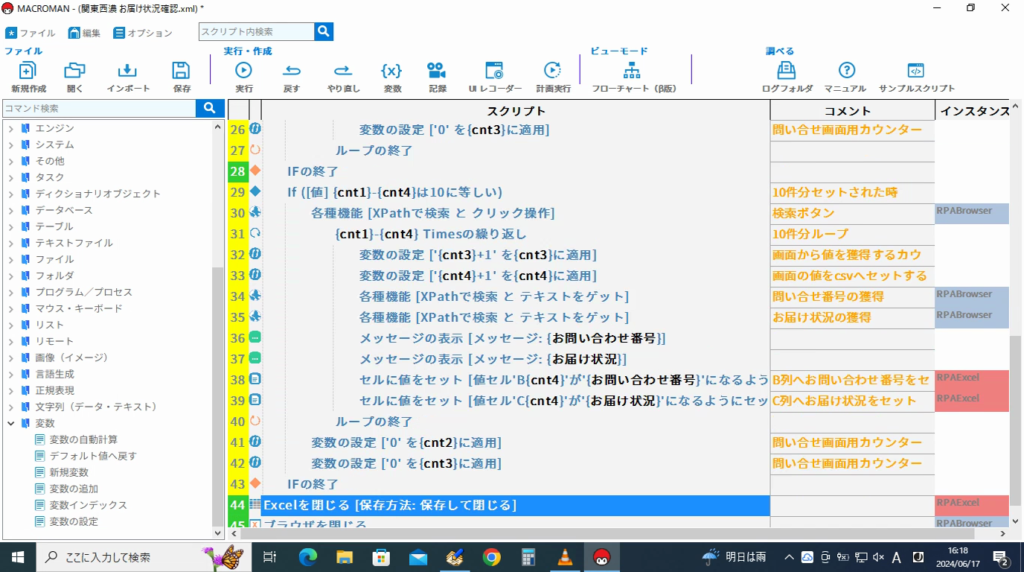
step.86
一覧画面に戻って来ますので、画面の通りになっていれば大丈夫です。
※「ループの終了」と「IFの終了」の間
続いてもう1つをリセットしたいので「アクション」の中から「変数」をクリック。
展開された中から「変数の設定」をクリック。
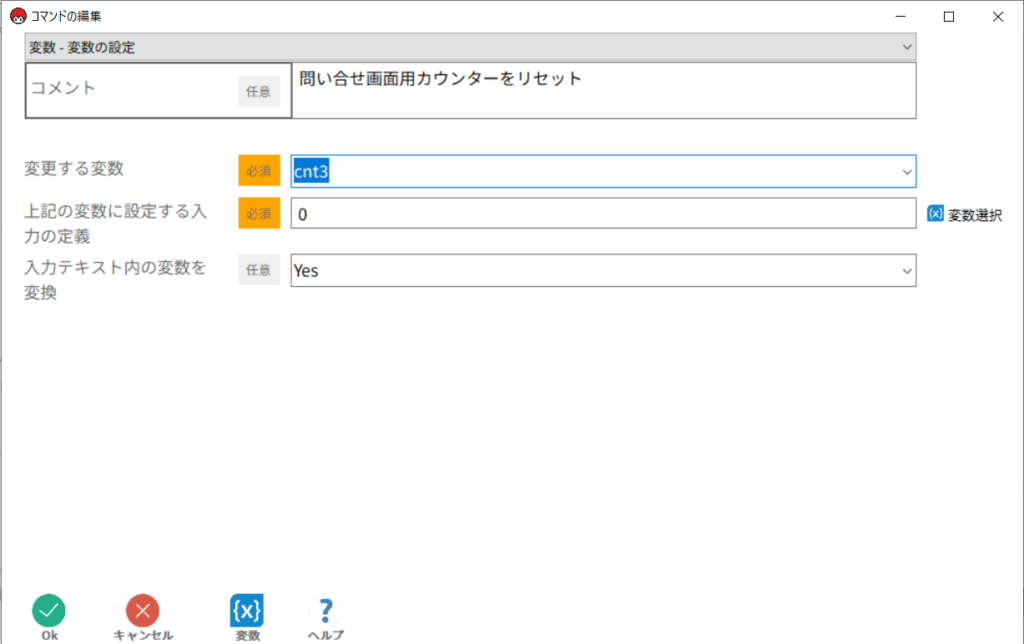
step.87
「変数の設定」画面が表示されるので
| 変更する変数 | 右側の▽を押下して「cnt3」を選択。 |
| 上記の変数に設定する入力の定義 | 0 |
最後に「OK」ボタンをクリック。
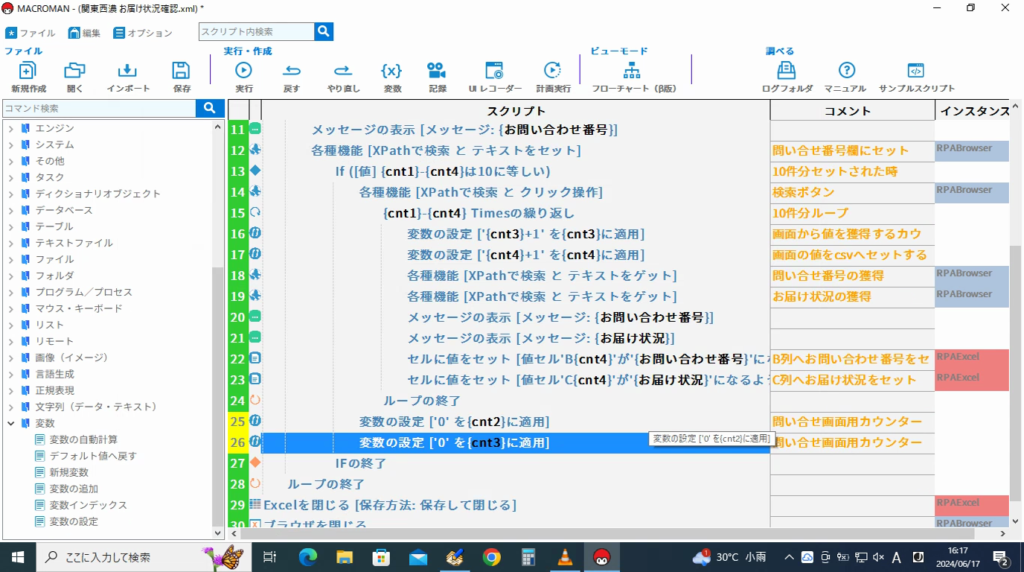
step.88
一覧画面に戻って来ますので、画面の通りになっていれば大丈夫です。
step.89
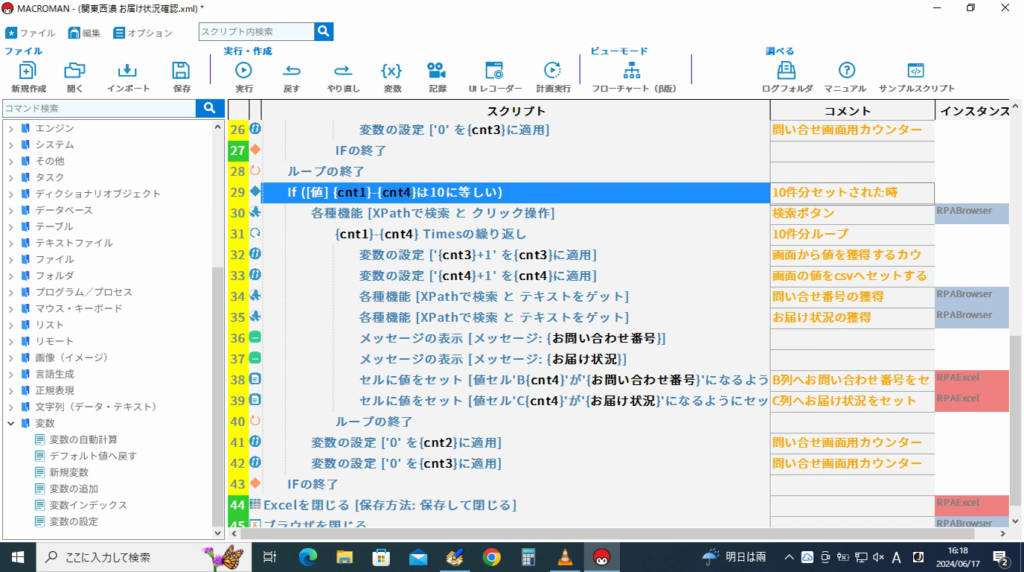
次に10件分の問い合わせ番号が無かった時の対応をとりたいので「IF文の始まりからIF文の終わりまでを」コピーします。
「IF文の始まりからIF文の終わりまでを」選択して右クリック「選択したコマンドをコピー」を選択して
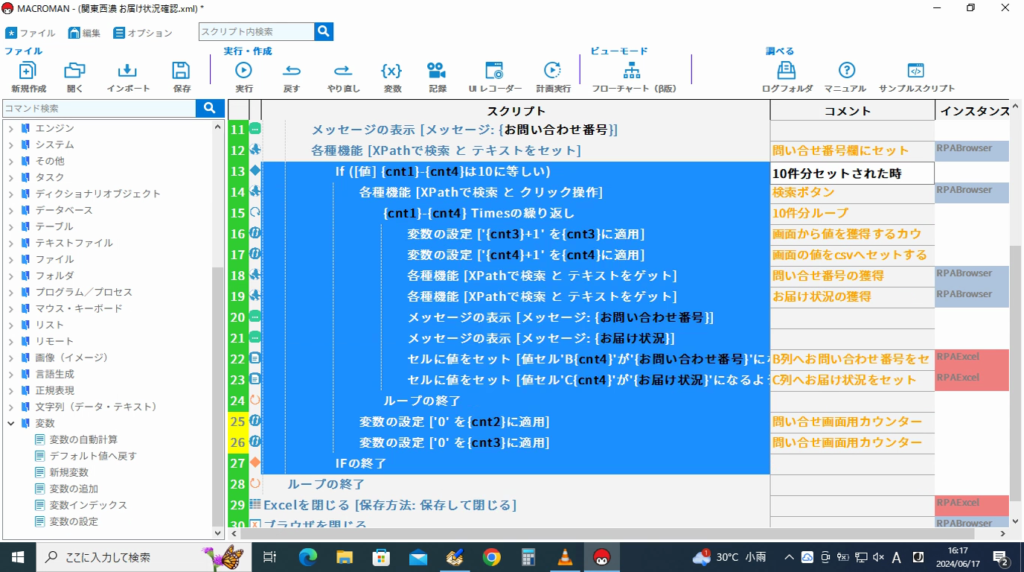
step.90
「ループの終了」の下に来るように「貼付け」をします。
step.91
一覧画面に戻って来ますので、画面の通りになっていれば大丈夫です。
「IF文の開始」の内容を変更したいので、「IF文の開始」をクリック。
step.92
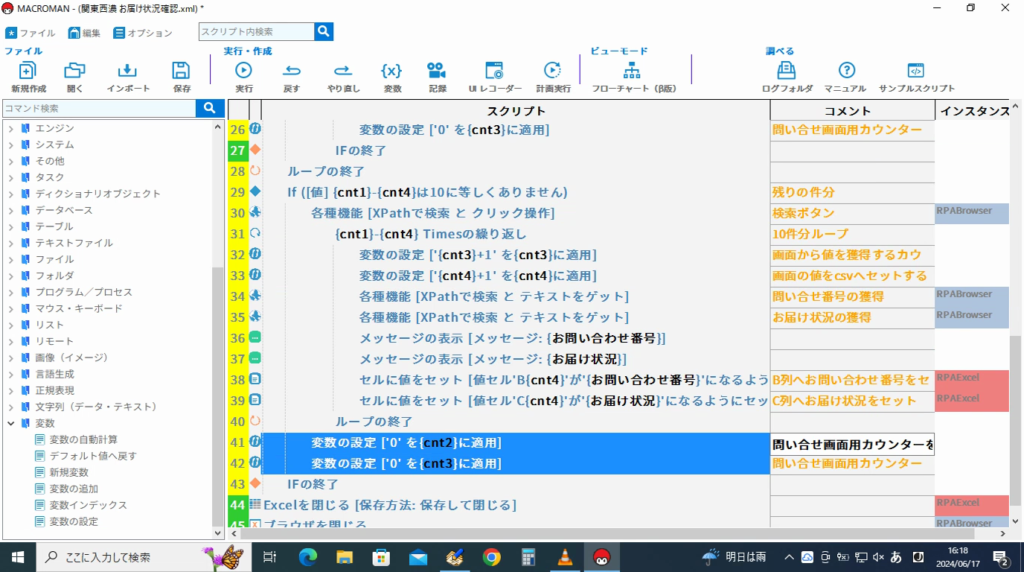
「IF文の開始」画面が表示されるので
| IFコマンドのタイプ | 右側の▽を押下して「値」を選択。 |
| Value1 | {cnt1}-{cnt4} を入力 |
| Operand | 右側の▽を押下して「is not equal to」を選択。 |
| Value2 | 10を入力 |
最後に「OK」ボタンをクリック。

step.93
「cnt2」と「cnt3」の変数の設定は必要ばないので削除します。
「変数の設定(cnt2)から変数の設定(cnt3)までを」選択して右クリック「削除」を選択してクリック。
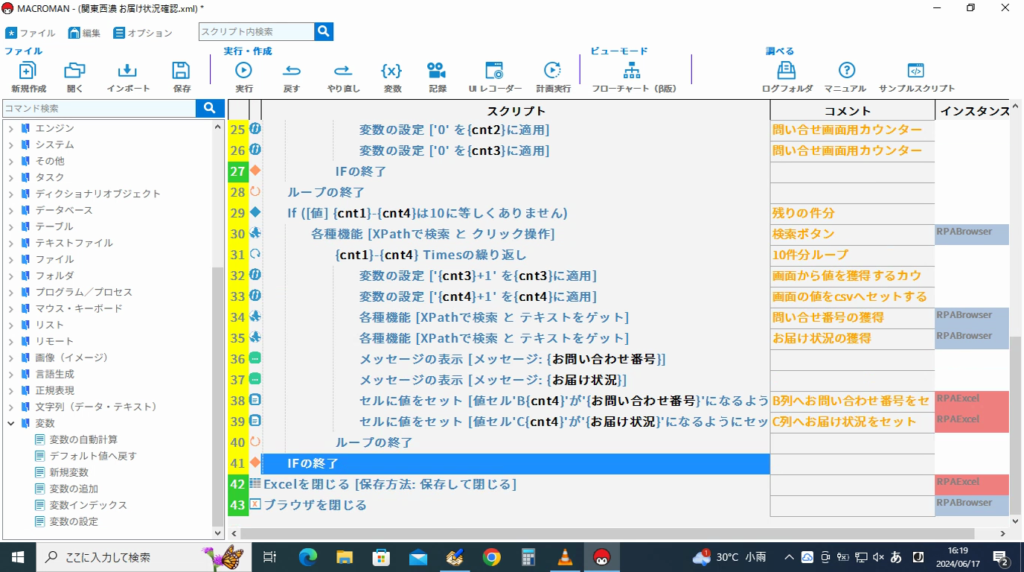
step.94
一覧画面に戻って来ますので、画面の通りになっていれば大丈夫です。
step.95
それでは、実際に上手く稼動するか確認していきましょう。
そのまえにメニューの「保存」ボタンを押下。
さっ メニューの「実行」ボタンを押下して下さい。
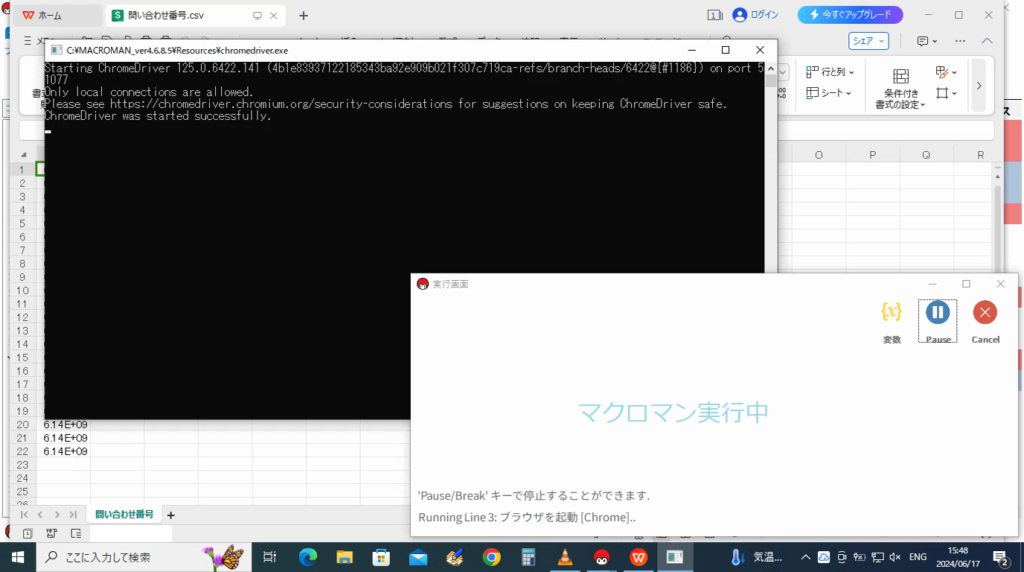
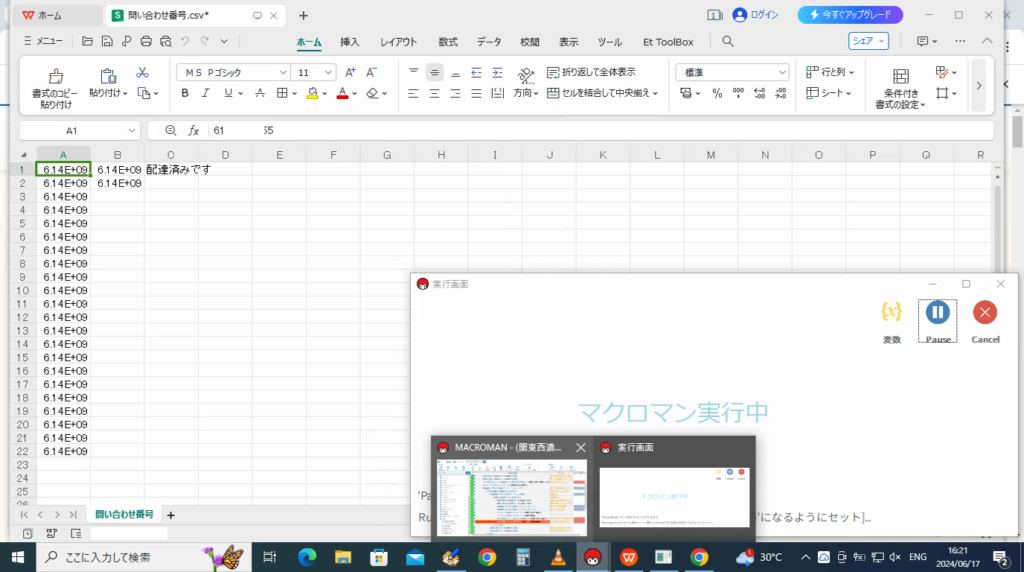
マクロマンが動き始めました。
step.96
シナリオ通り、chromeを起動させ、Excevを起動。
対象のcsvを開いて。
step.97
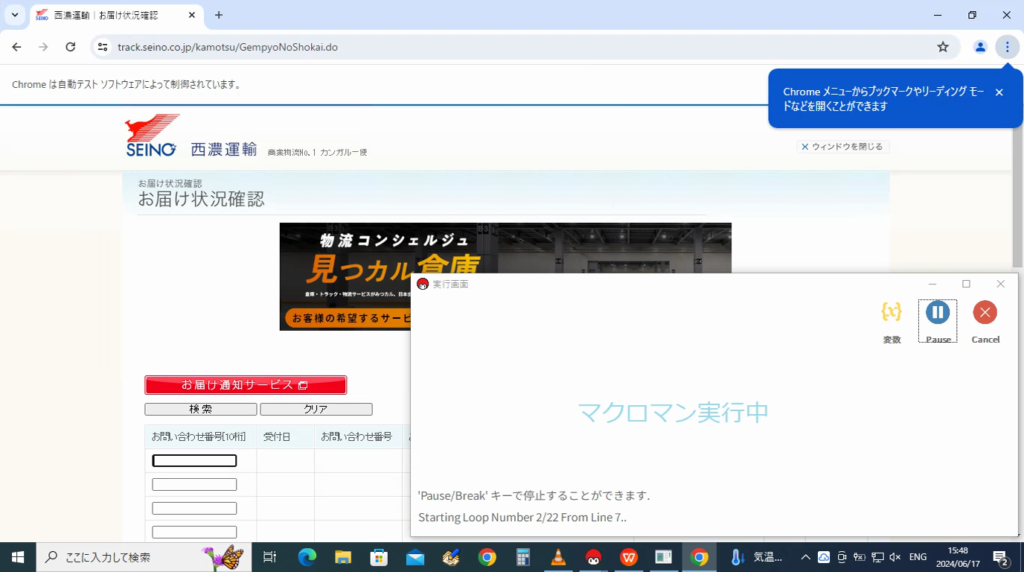
お問い合わせする件数を獲得し表示。
step.98
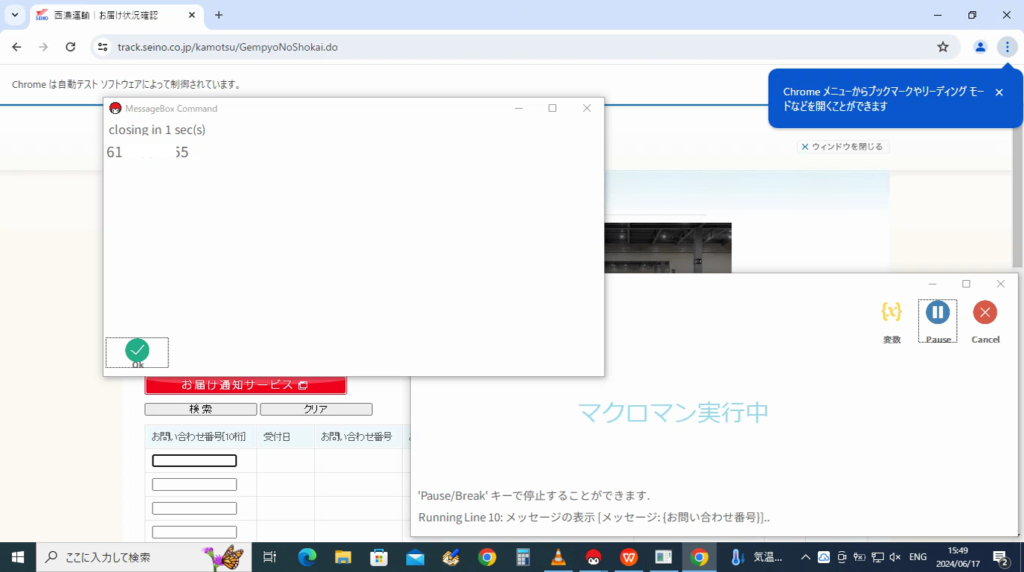
1件目のお問い合わせ番号を獲得、表示。
ここまで問題なく成功!
step.99
獲得したお問い合わせ番号を「お届け状況確認」画面の入力欄にセット。
10件分セット終了後に問題なく「検索」ボタンを押下。

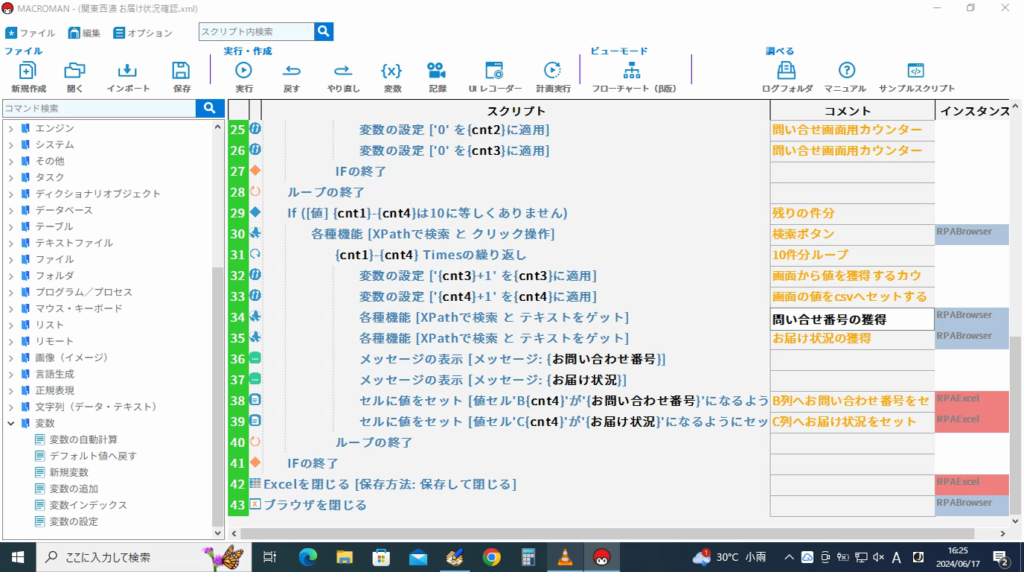
step.100
画面に「お問い合わせ番号」と「お届け状況」が表示されたので、この値をExcelのB列とC列に順番にセットしています。
step.101
問題なくマクロマンが終了!
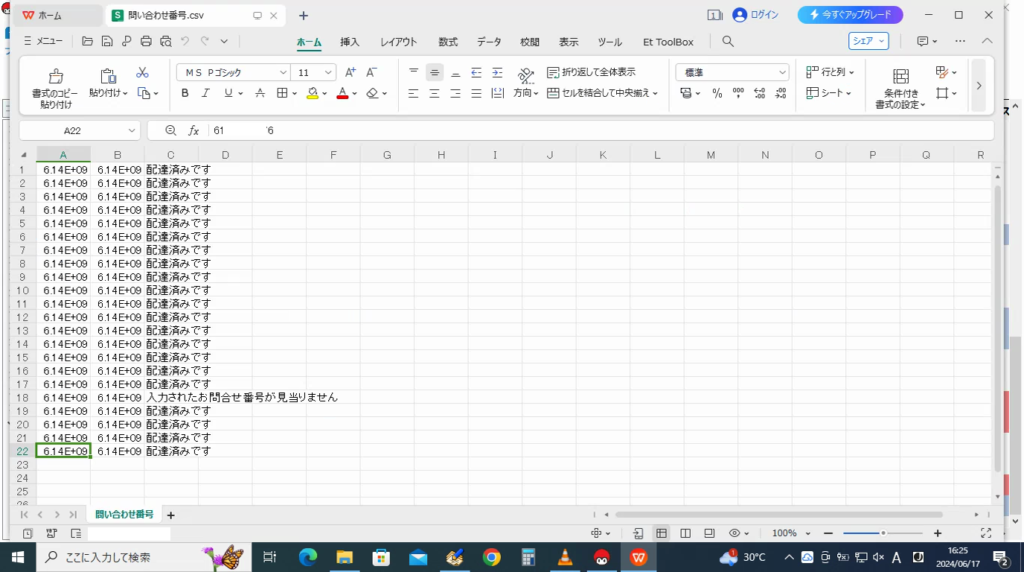
step.102
csvファイルを確認するとシナリオ通りに値を獲得して保存されていました。
コーポレートサイトhttps://www.rin-tech.netを開設しました。
どうぞ、よろしくお願いいたします。


コメント